AWS Data Sync
Hi Guys, in this post we will learn how to work with AWS DataSync services.
AWS DataSync is a online data transfer service that simplifies an automates and moving data between storage system and services. DataSync can copy data to and from between onprem and AWS services, even we can transfer data between cloud storage and AWS services as well, Ex amazon s3 to EFS. Using DataSync we can transfer data ten time faster.
Steps:
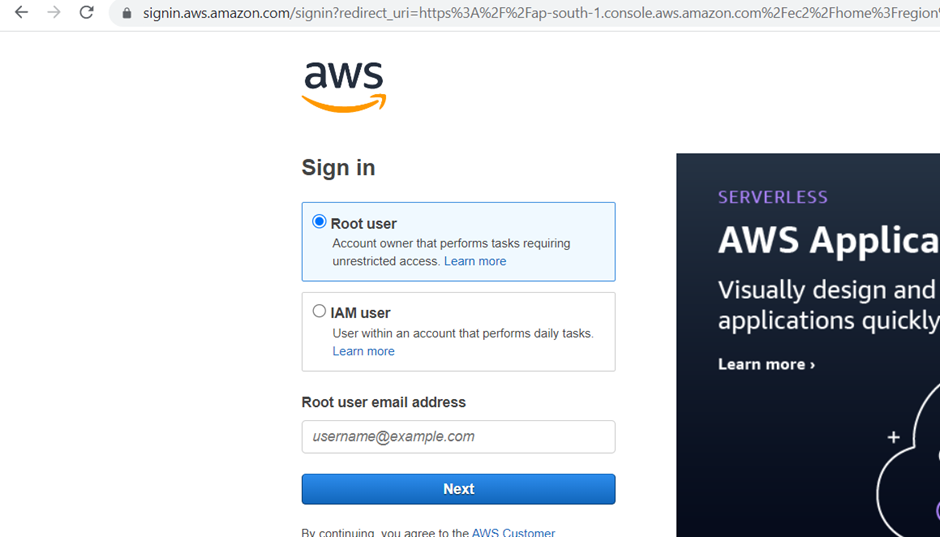
1 Login in AWS Account
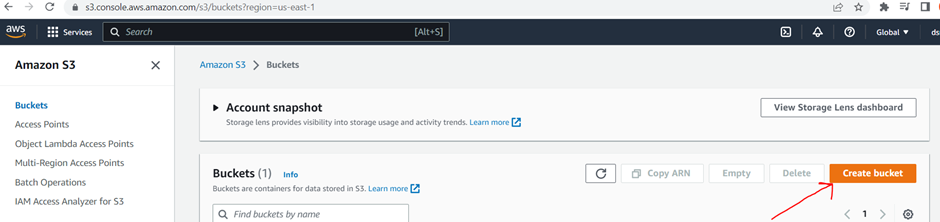
2 Make s3 bucket with same data object.
3 Make SecurityGroup with some port like http/https/ssh/nfs
4 Make iam user and generate ami ids
5 Launch second ec2 instance
6 Launch EFS service
7 Config data sync agent and configure data sync tasks
First Login in AWS Account
Search and click on s3 for making s3 bucket then click on “Create bucket” button
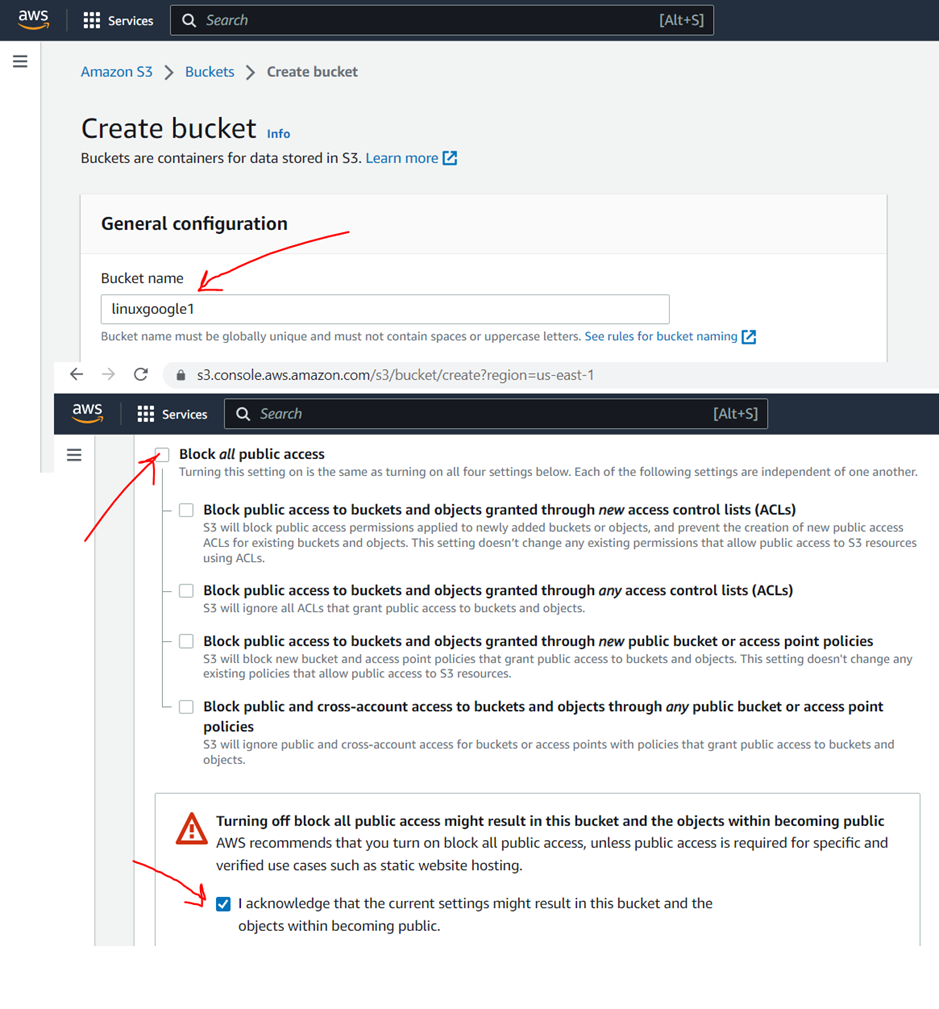
Enter the “Bucket name” , uncheck “Block all public access” checkbox and select the acknowledge checkbox and then click on “Create bucket” button.
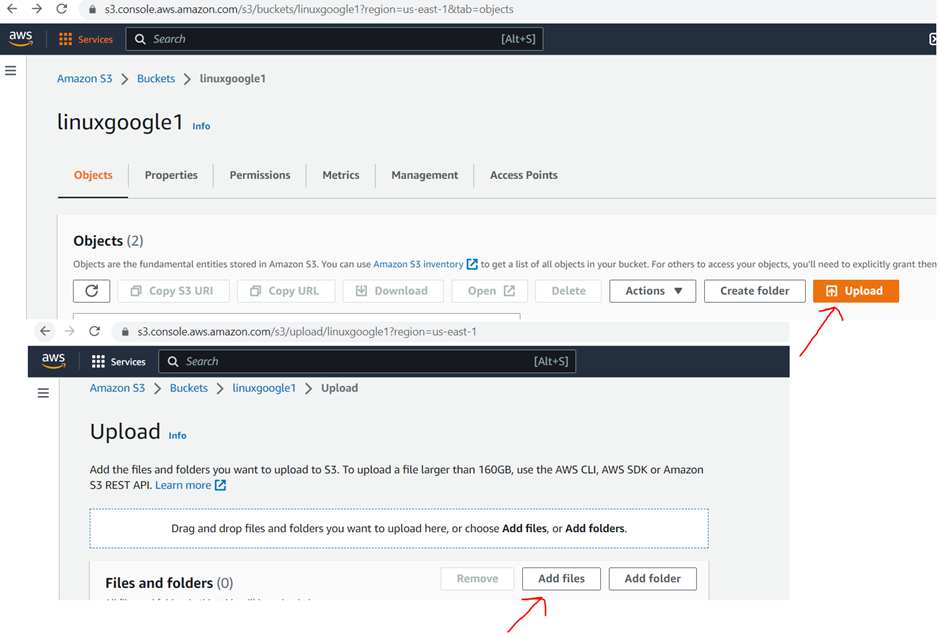
Go in view detail

Then click on “upload” and “Add file” button and at last click on “Upload” button
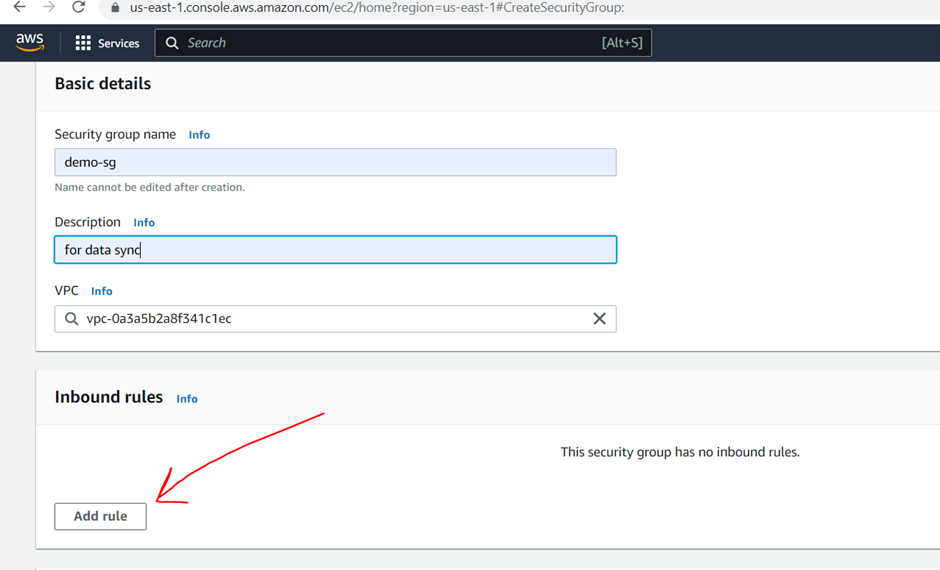
Now create “security Group” with some with some port like http/https/ssh/nfs. For that go on ec2 dashboard or you can search ec2 in search bar, inside ec2 dashboard you can search “Security Group” link, click on it.
Then click on “Create Security group” button

Enter “Security group name” and description then click on “Add rule” button
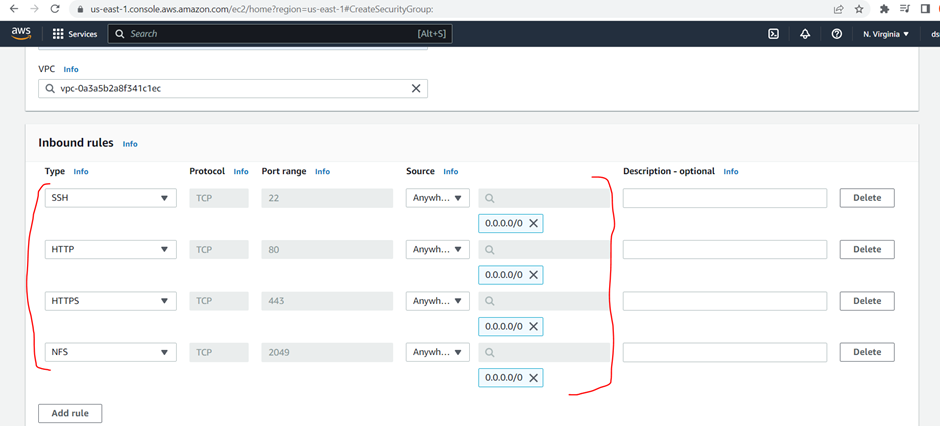
Select all port with source and click on “Create Security Group” button
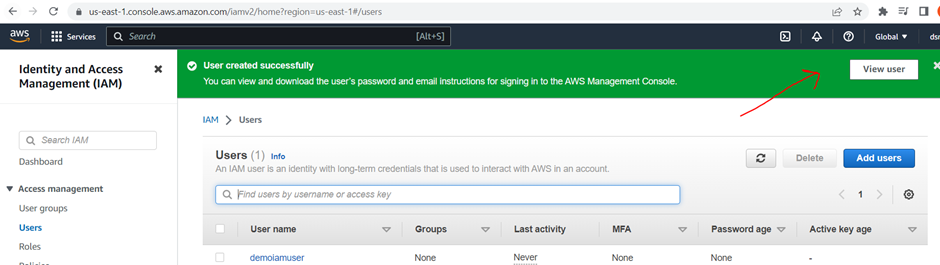
Now create iam user , for creating iam user go to ec2 dashboard and search for iam and click on it.

Then click on “User” tab in left side and click on “New Users” button in iam user dashboard.

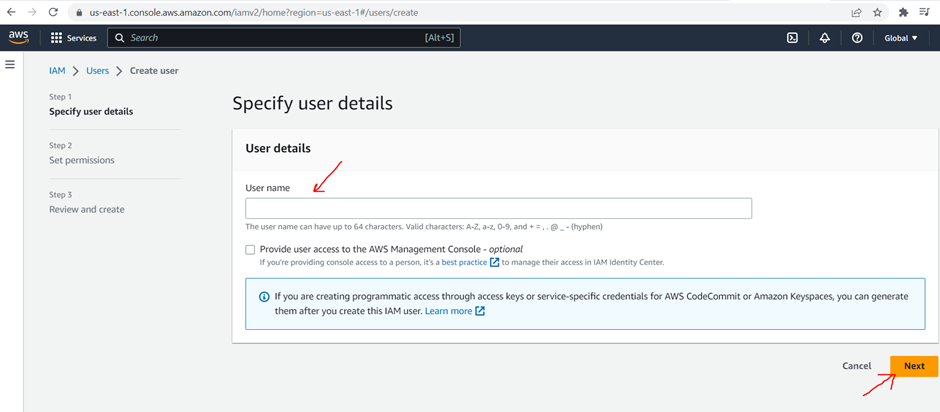
Enter user name and click on “Next” button
Now select “Attach policies directly” radio button and “Administrator Access” checkbox and click on “Next” button and last click on “Create User”

Now click on “View User” for creating access key
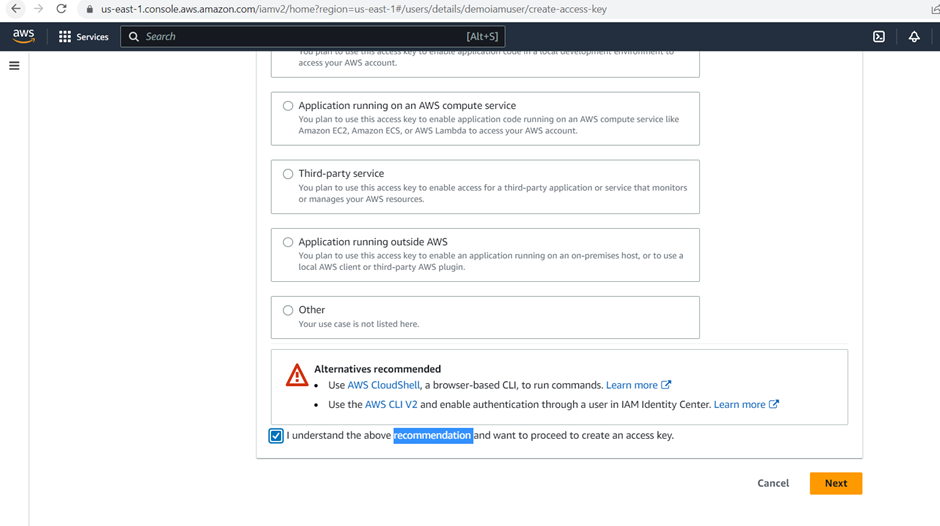
Inside view user select “security credentials” and then click on “Create access key”

Select “Command Line Interface (CLI)” radio button and “recommendation “ checkbox “ then click on “Next” button
Enter “Description tag value” and click on “Create access key” button, keep secret and access key in notepad.

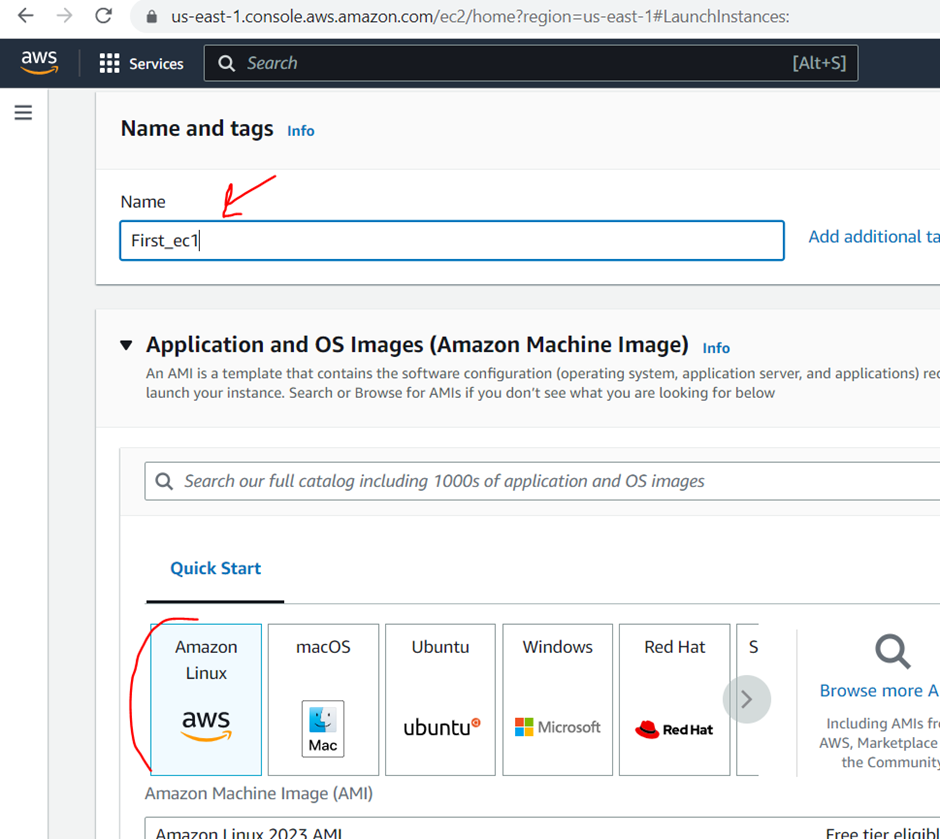
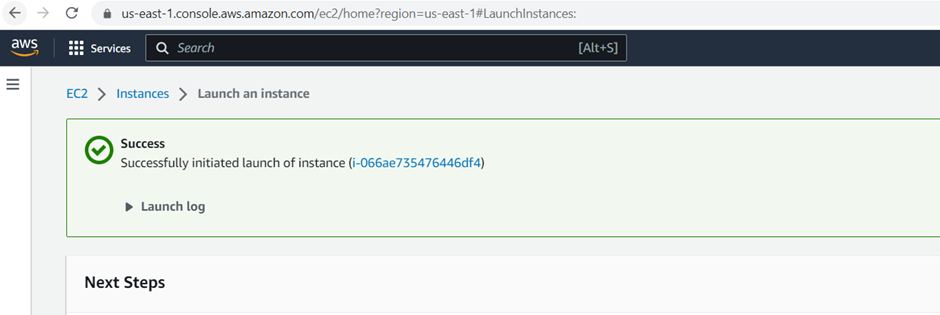
Now launch ec2 instance for launch instance go to in ec2 dashboard and click on “Launch Instance”, enter instance name, select AMI “Amazon Linux”
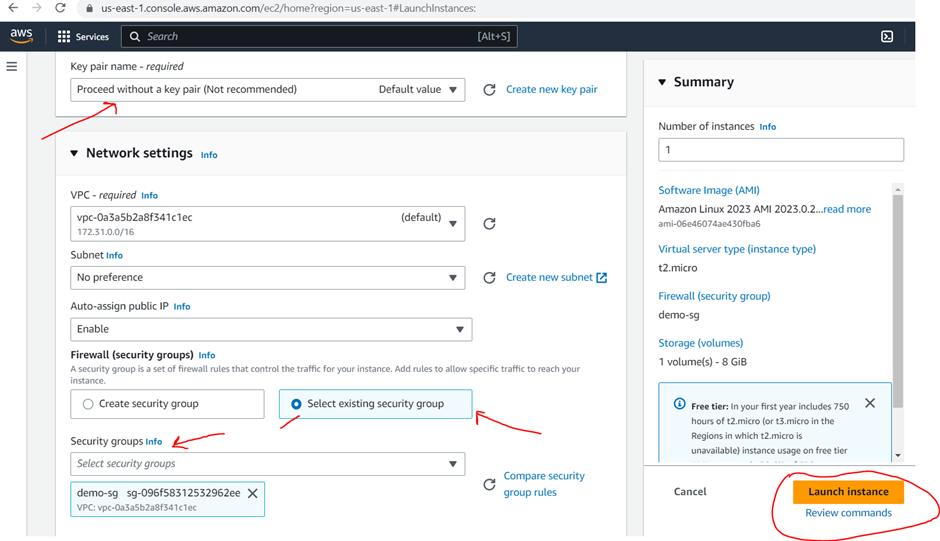
Select key pare default in network setting click on “Edit” , now select “Select existing security group” radio button and select the “Security Group” which you created then click on “Launch Instance”.
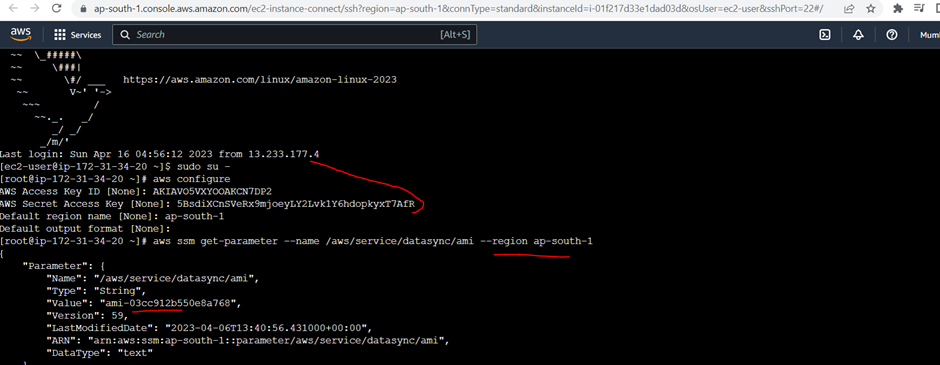
For ami id we have to run below command with region name you can replace the region which you are using
aws ssm get-parameter –name /aws/service/datasync/ami –region region
for using above command first connect with instance which you just created,
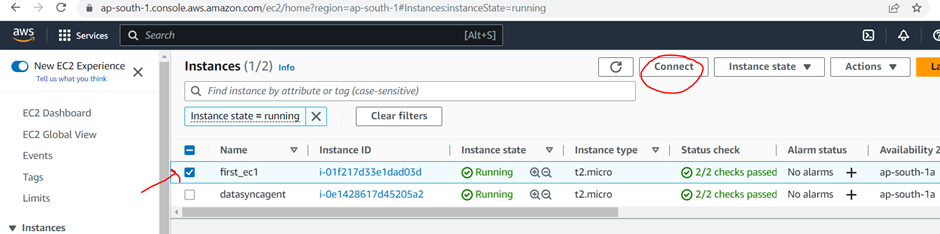
for connecting the instance got to instance select your instance and click on “Connect” button

And then click “Connect” in bottom

You should be able to connect then run below commands.
- Sudo su –
- Aws configure (For config)
- Enter secret and access key which you generate with iam user
- Enter region like: ap-south-1
- Enter for default format
- Now run mention command with your region : aws ssm get-parameter –name /aws/service/datasync/ami –region region
- After running above command you will get a ami id copy it and create a new instance
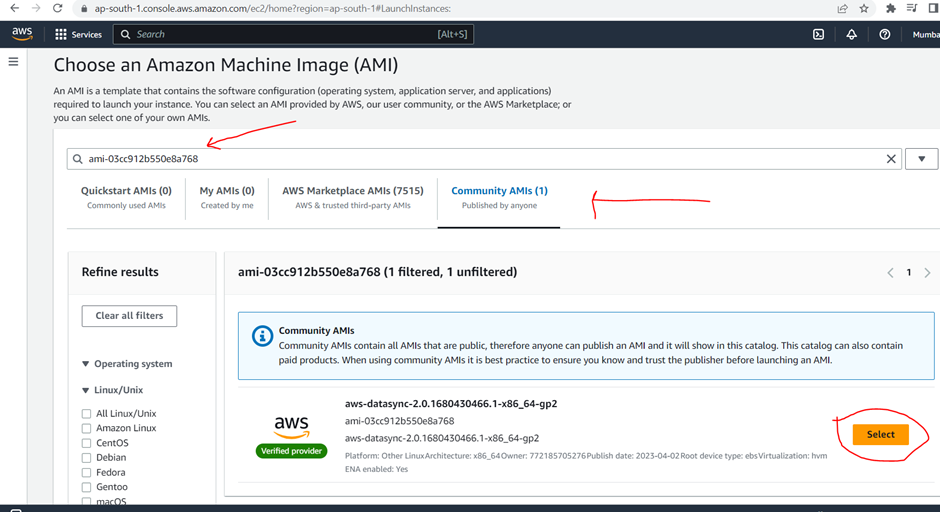
Go in ec2 dashboard click on launch instance, enter the instance name and click on “Browse more AMIs”

Search your “AMI” id click on “Community AMI” and then click on “Select” button in bottom
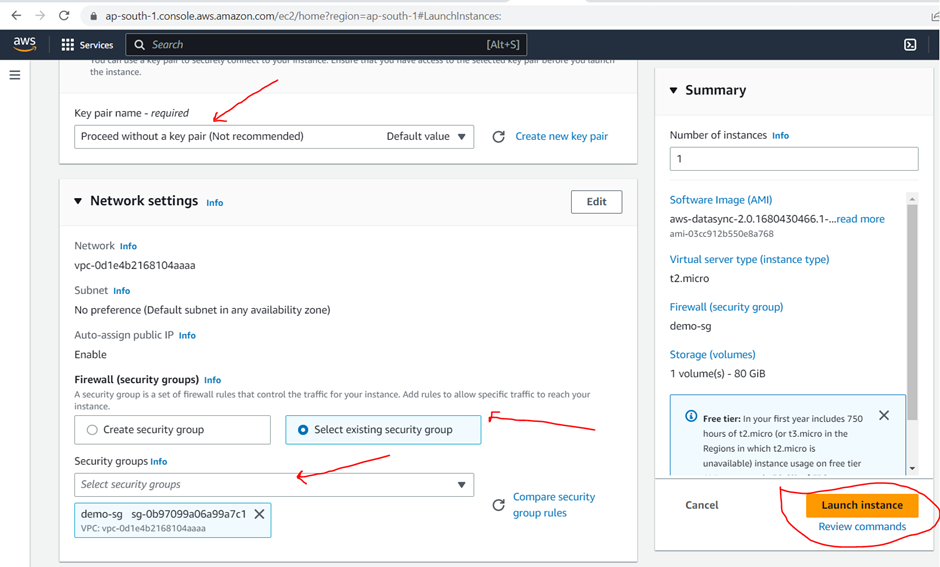
Select default “Key Pair” , select existing security group radio button and click on “Launch Instance” button.
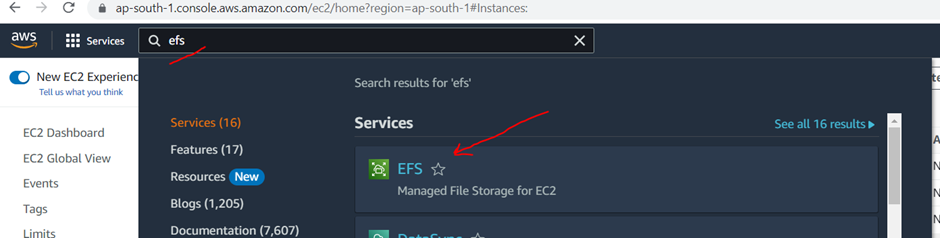
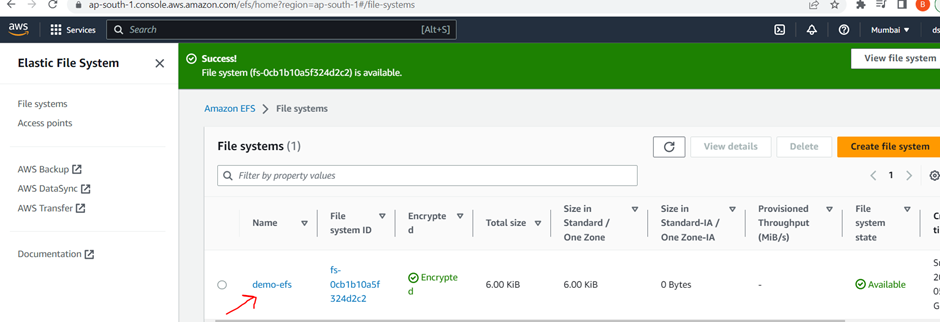
Now create “EFS” so search EFS in search box and click on it.
Then click on “Create File System” button. Enter the EFS name and click on “Create” button
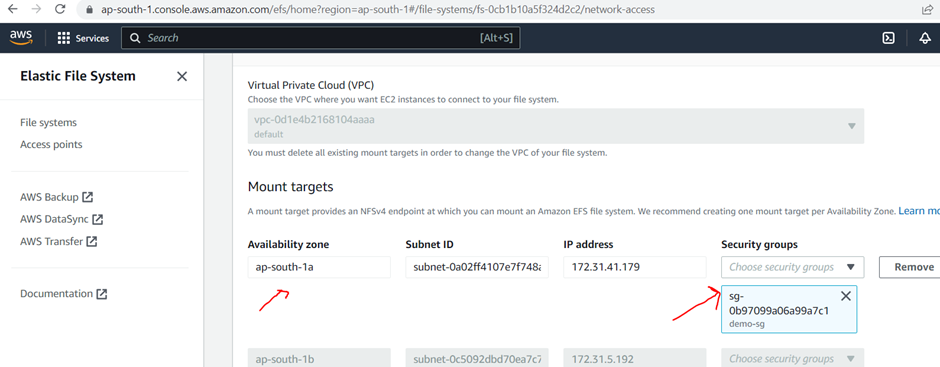
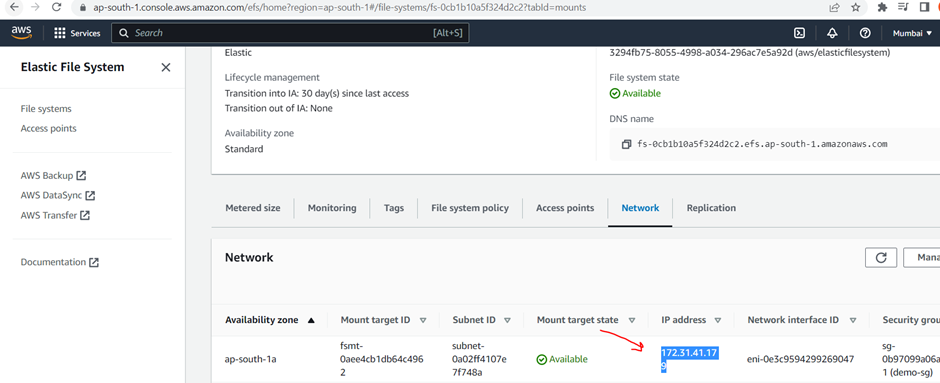
Now click on “EFS” name then click on “Network” and “Manage” button.
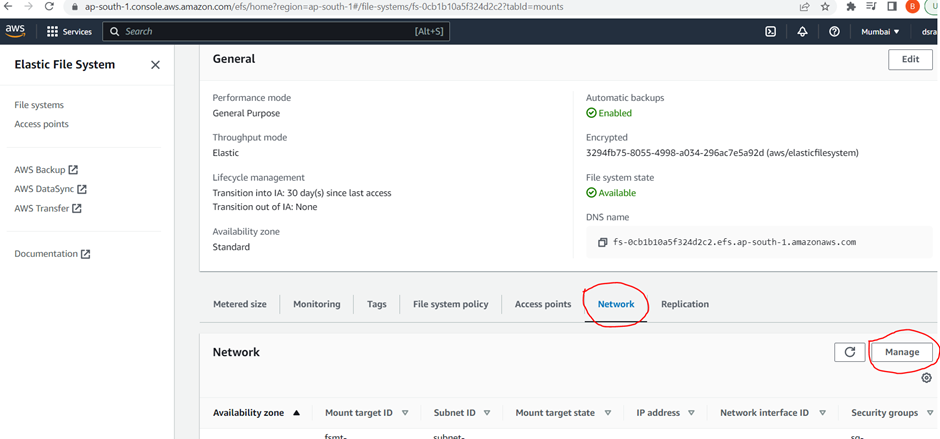
Keep “Availability zone” which you require else you can remove and select “Security Group” which you created.
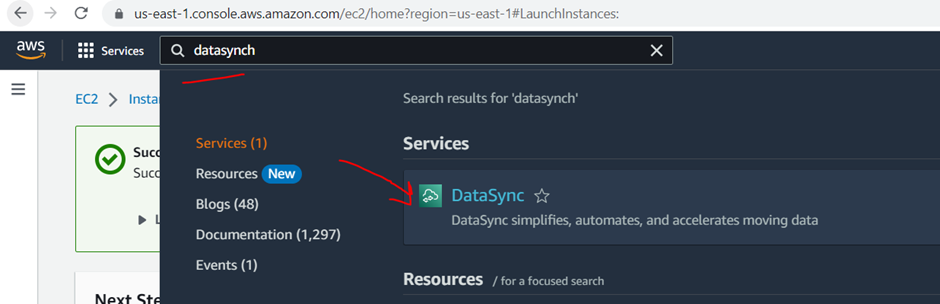
Now go in “Datasync” search DataSync in ec2 dashboard and click on it
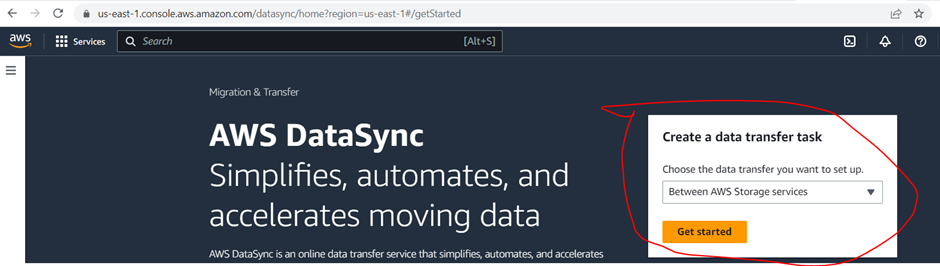
Choose the data transfer you want to set up, “Between on-premises storage and AWS” or “Between AWS storage Service” in my case I am selecting “Between AWS storage Service” and click on “Get Start” button.
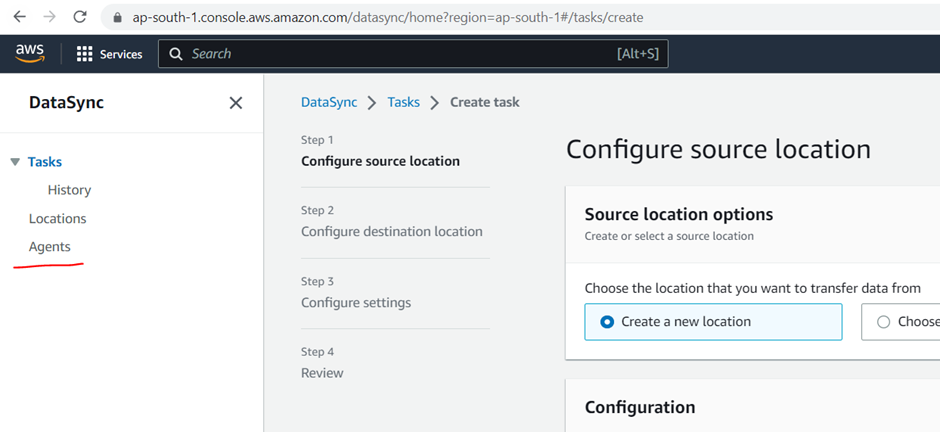
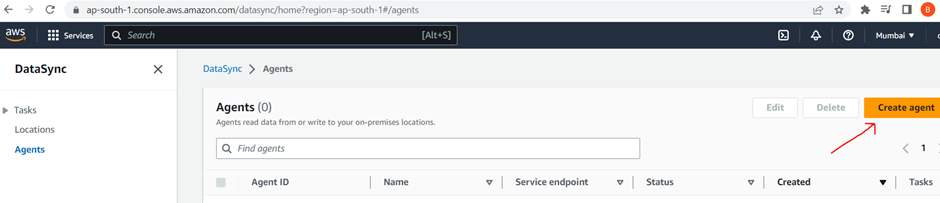
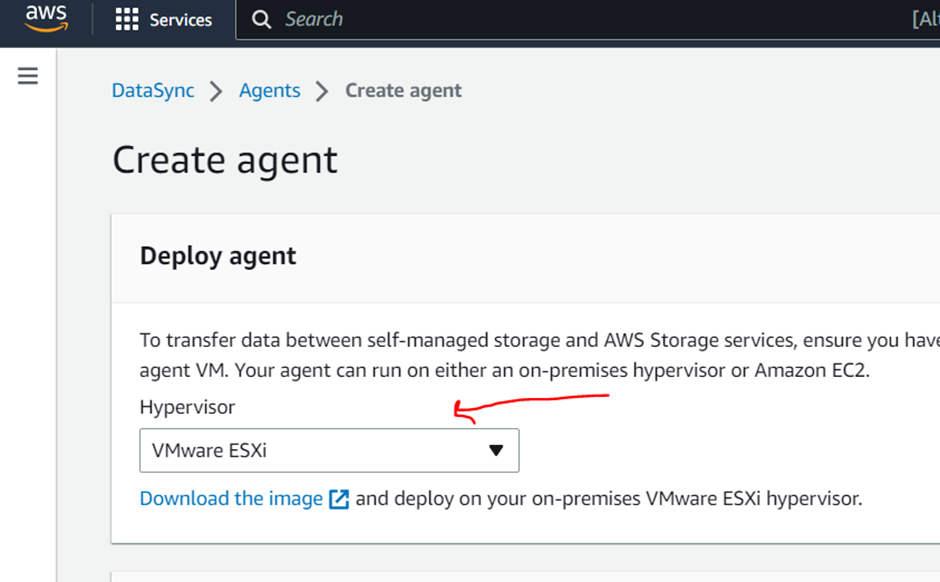
In the left navigation select “Agents” tab
Then click on “Create Agent” button on right side.
From “Hypervisor” dropdown select which you need, in my case I am selecting “Amazon EC2”
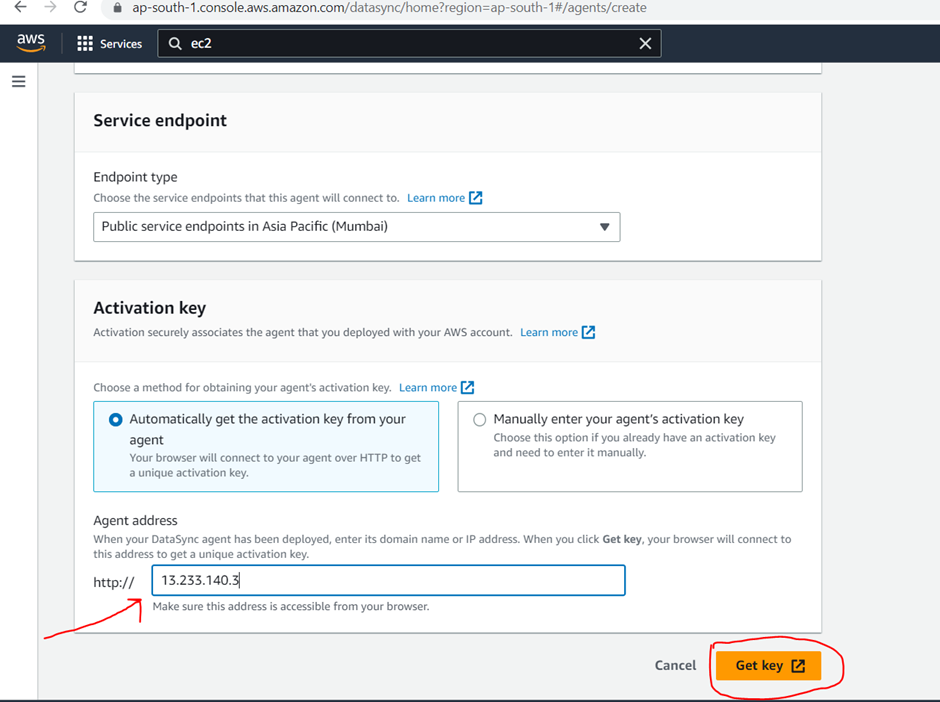
And in “Agent Address” field it should be agent instance public ip.
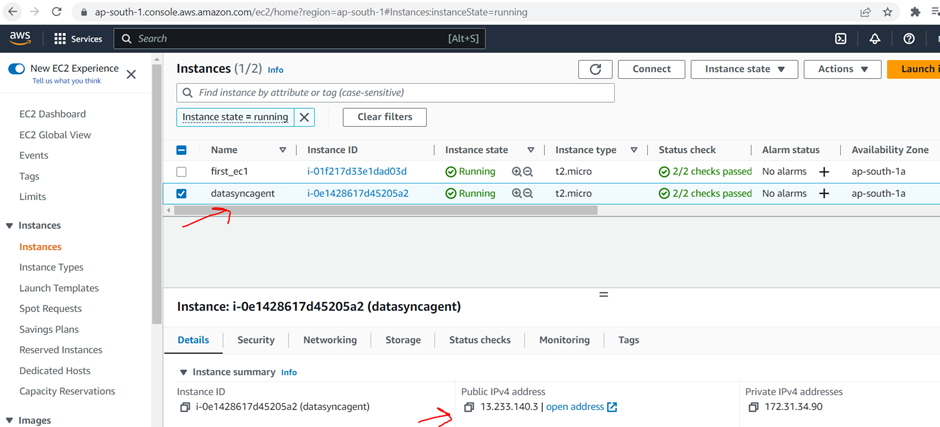
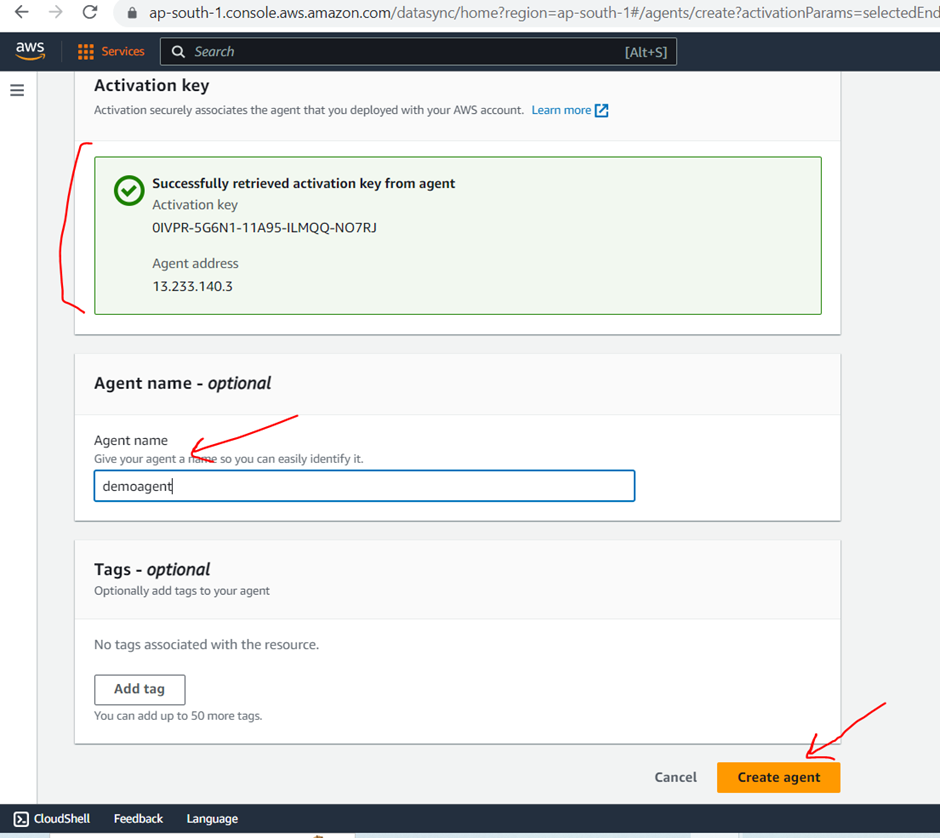
Enter public IP in Agent Address field and click on “Get Key” button and get the success message
Copy it and keep in notepad. Then enter agent name and click on “Create Agent” name
Agent is used for the communicate between different – different types of environment.
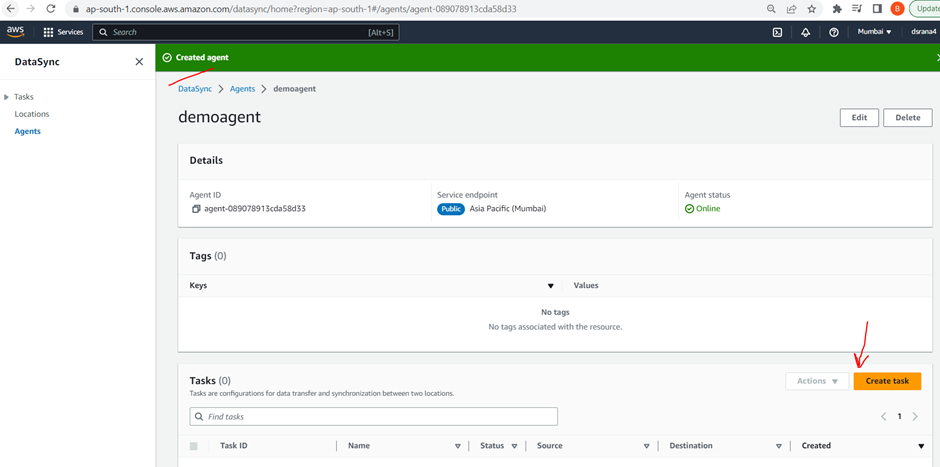
Agent have created successfully now create task, for creating task click on “Create task” button
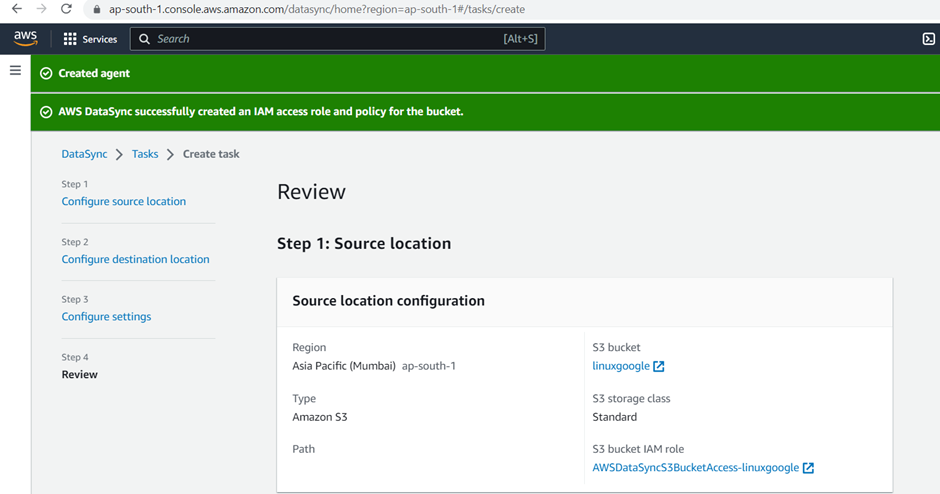
Task: Tasks are configurations for data transfer and synchronization between two locations
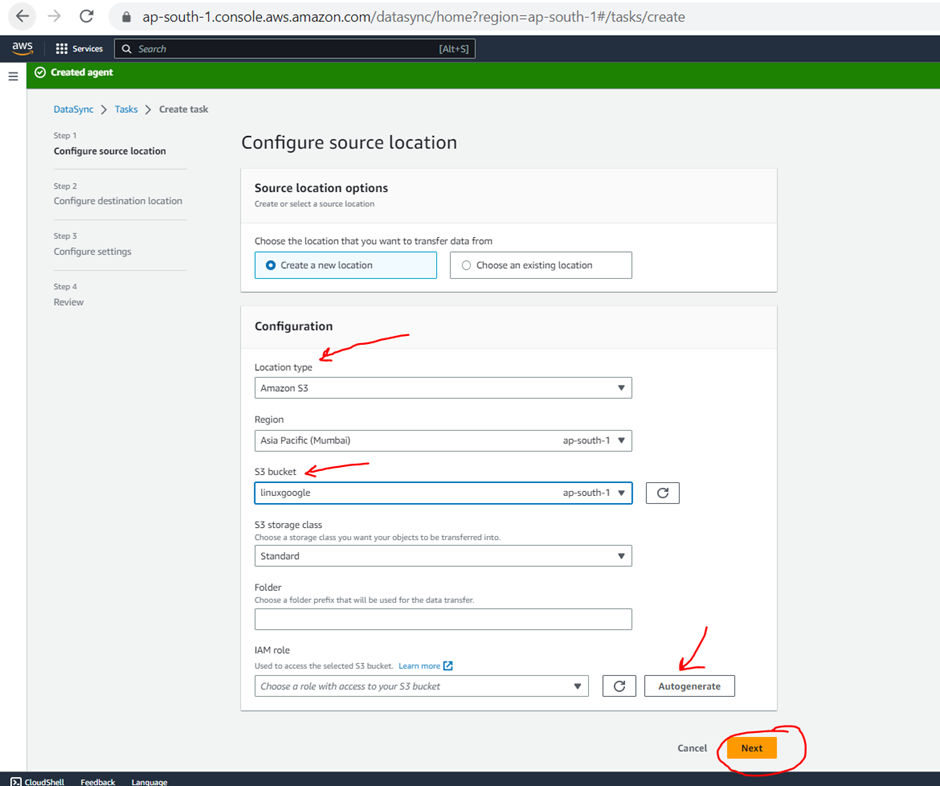
Select the “Location Type” , select “S3 bucket” which you created you can create the iam role or you can autogenerate it then click on “Next” button.
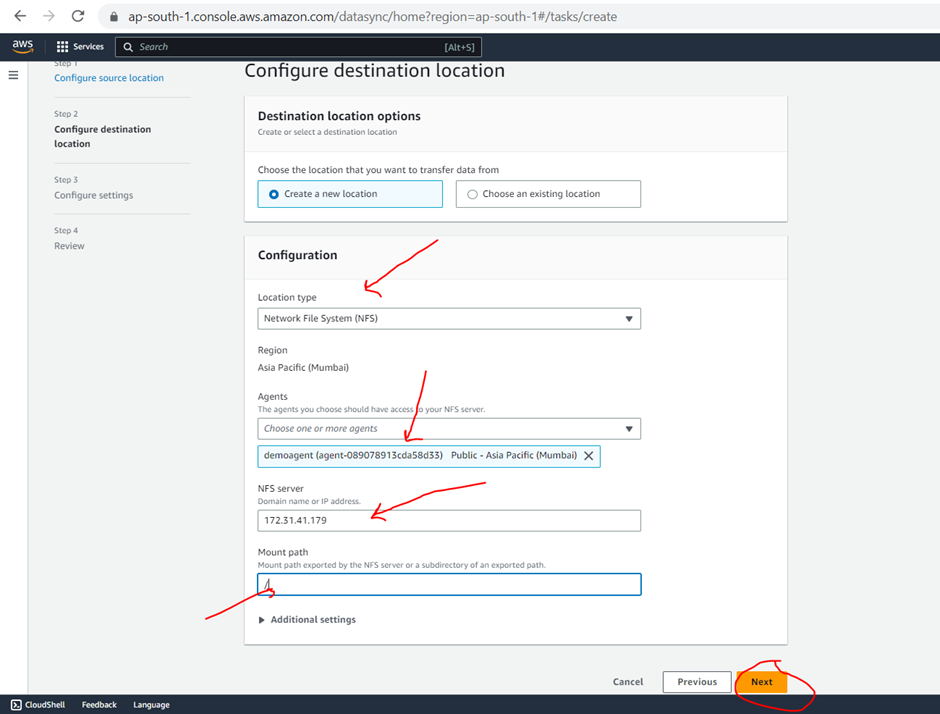
Now for “Configure destination location” select “Location Type” in my case I am using “NFS”, then select the agent which you created, enter NFS IP which you can copy from EFS dashboard and then click on “NEXT” button
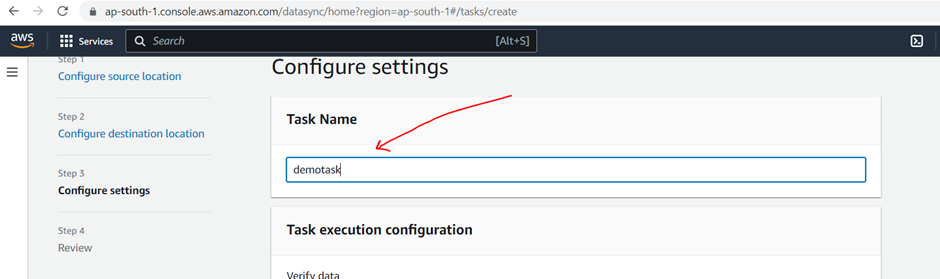
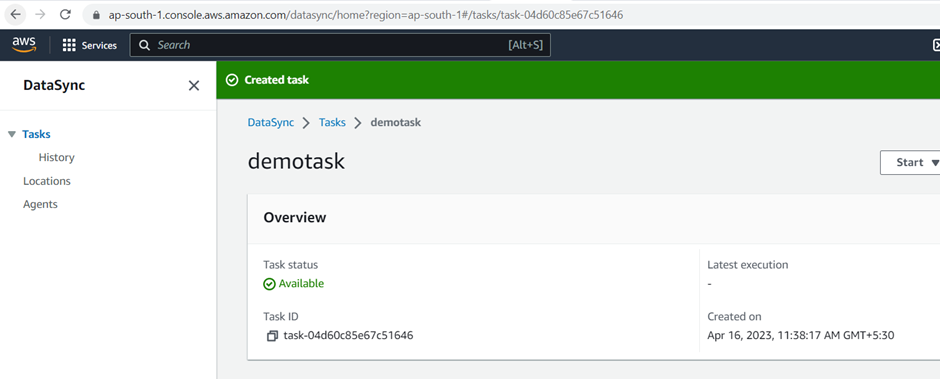
Enter “Task Name” and click on “Next” and then “Create task” button.
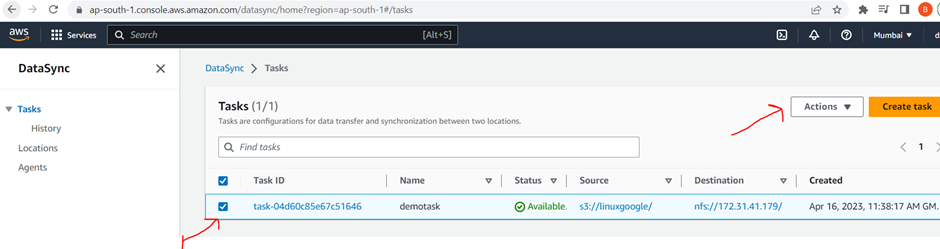
Now go to “Task” dashboard select task checkbox and from action dropdown select “Start”
Now go to instance and connect with “first_ec1” instance
Now login in it using below command
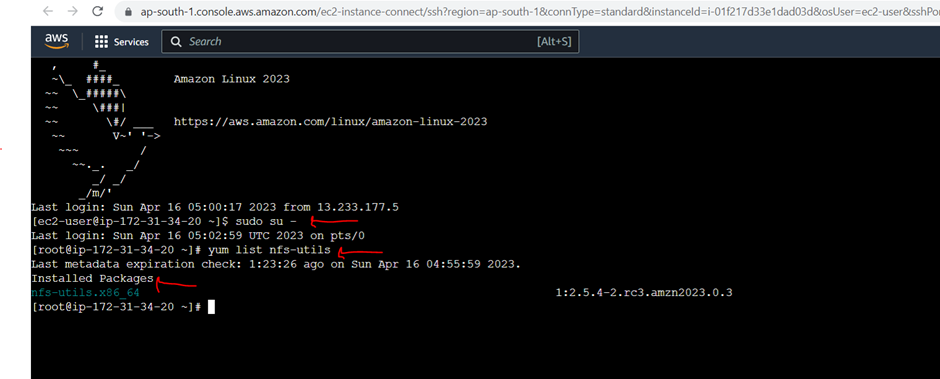
sudo su –
now check NFS utills install or not
yum list nfs-utils
Now go back EFS click on attach option for get the complete path
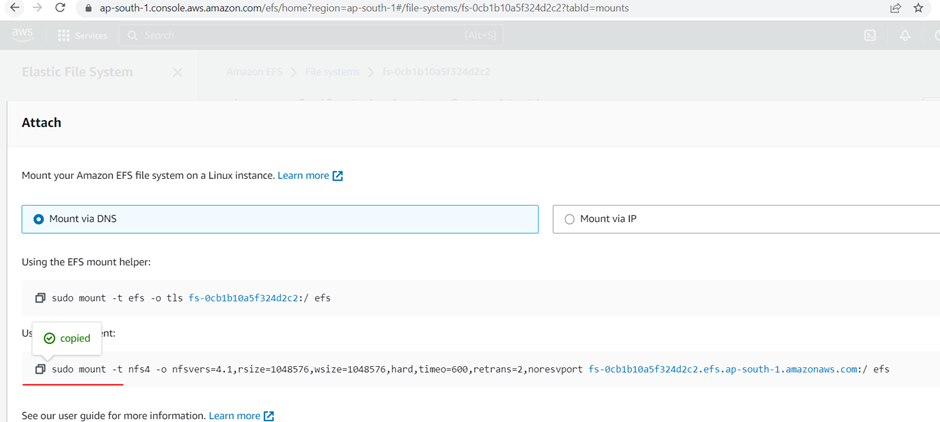
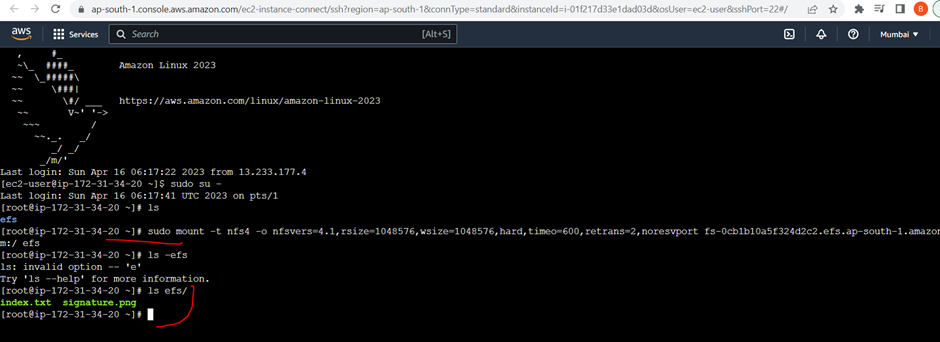
Now in ec2 instance create efs folder using “mkdir efs” because of mount point and then run above sudo command. For checking file are there or not use ls with path like ls efs
Keep Learning 🙂