How to create ec2 instance in AWS?
Follow below steps to create an EC2 instance in AWS
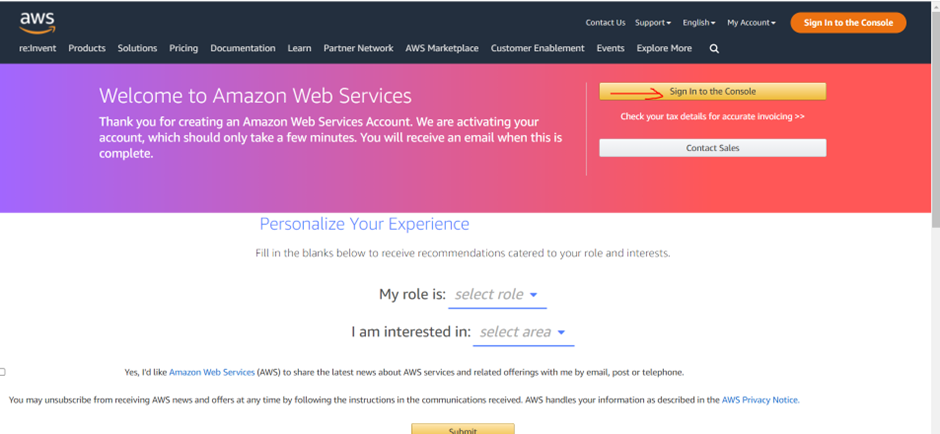
Sign In: First Sign into the AWS Console.
![](https://blogshub.co.in/wp-content/uploads/2023/01/image-142.png)
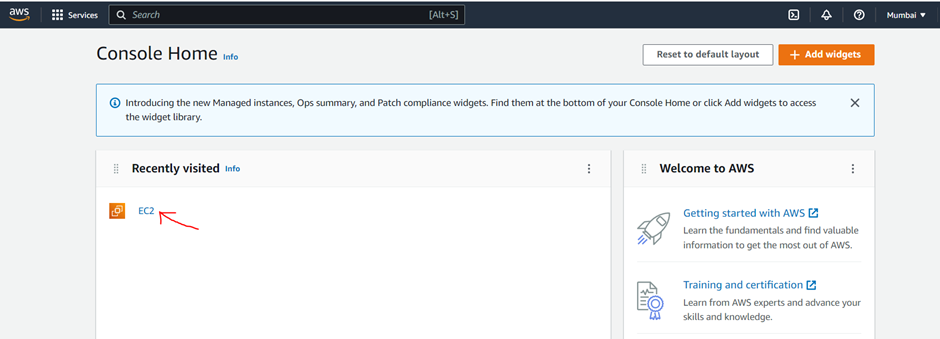
Select EC2: Now choose “EC2” to open the Amazon EC2 console.
![](https://blogshub.co.in/wp-content/uploads/2023/01/image-143.png)
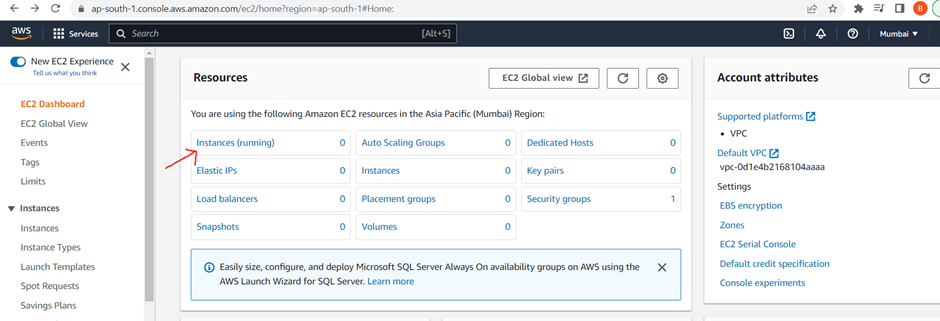
Click on instance running: On the Resources section click on Instances (running) link
![](https://blogshub.co.in/wp-content/uploads/2023/01/image-144.png)
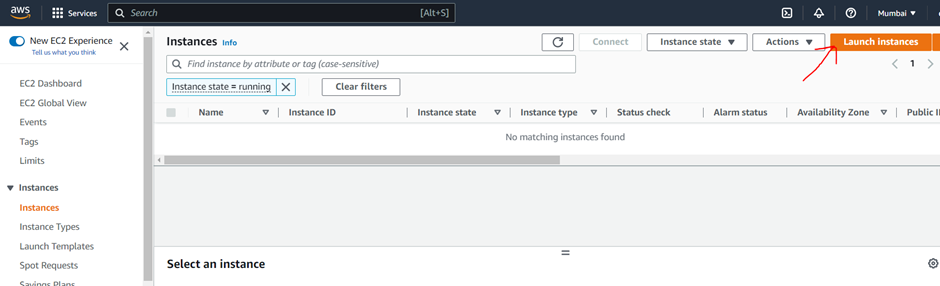
Launch Instance: Then, in the instance section click on “Launch Instances” button.
![](https://blogshub.co.in/wp-content/uploads/2023/01/image-145.png)
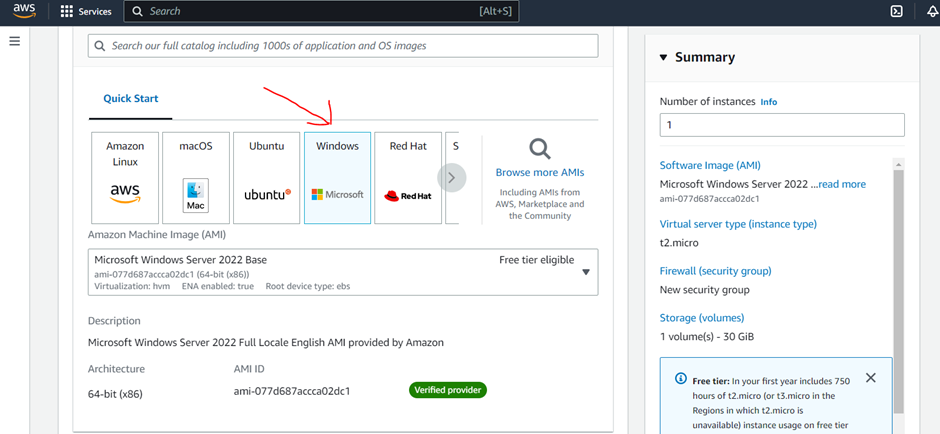
Now choose an AMI provided by AWS or can choose your own AMI, AMI is a template that contain software to require an instance, select windows to “Quick Start”.
![](https://blogshub.co.in/wp-content/uploads/2023/01/image-146.png)
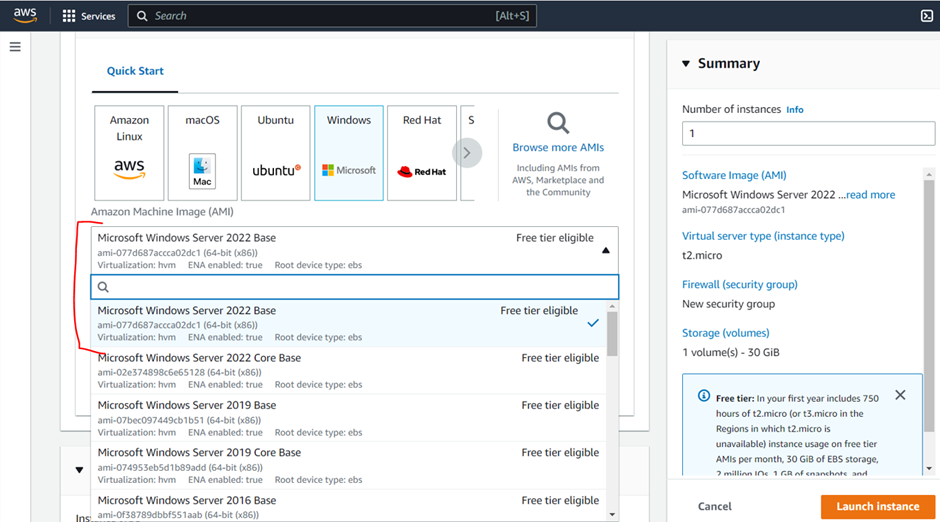
Now from dropdown select any Microsoft Window Server with free tier eligible
![](https://blogshub.co.in/wp-content/uploads/2023/01/image-147.png)
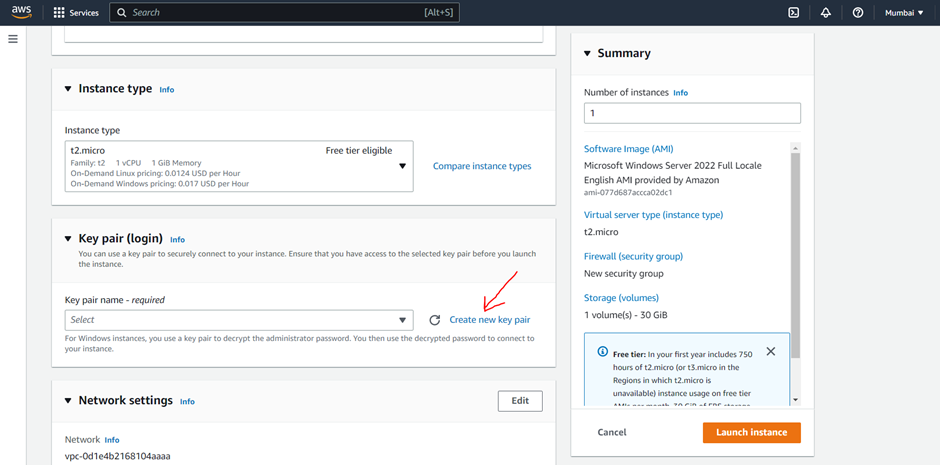
Create a new key pair
![](https://blogshub.co.in/wp-content/uploads/2023/01/image-148.png)
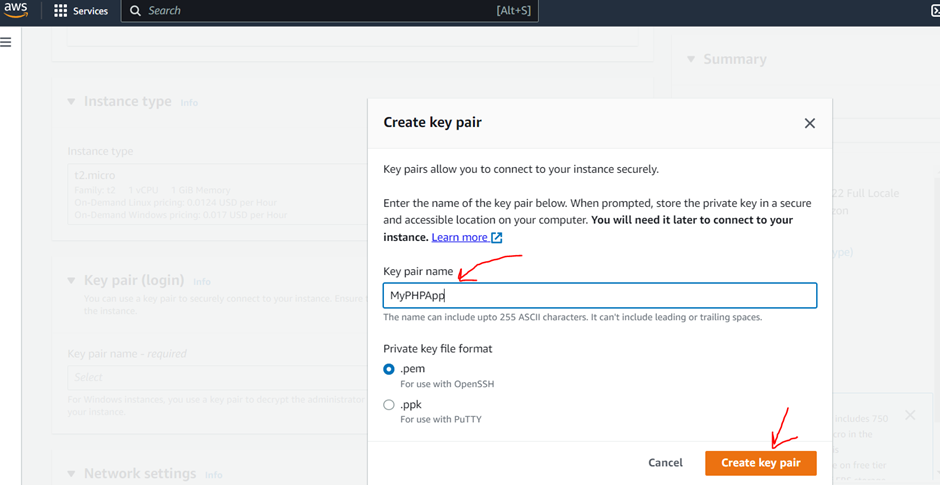
Enter the Key Pair name and then click on “Create Key Pair” button, it will download a “.pem” file store it anywhere in your local system.
![](https://blogshub.co.in/wp-content/uploads/2023/01/image-149.png)
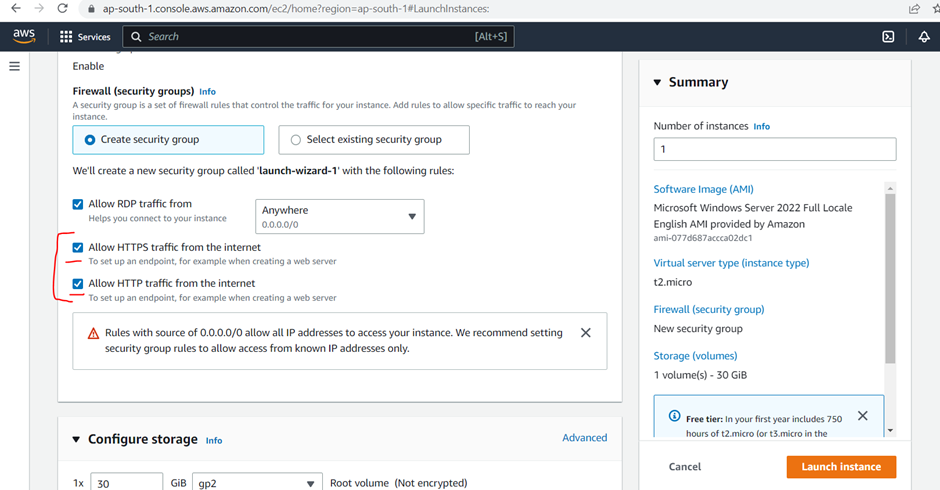
Select HTTP and HTTPS checkbox to network setting.
![](https://blogshub.co.in/wp-content/uploads/2023/01/image-150.png)
Then click on Launch Instance button
![](https://blogshub.co.in/wp-content/uploads/2023/01/image-151.png)
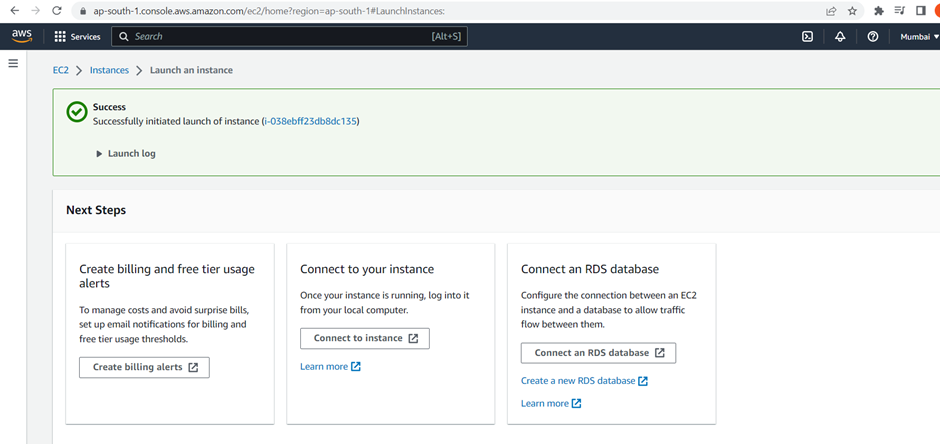
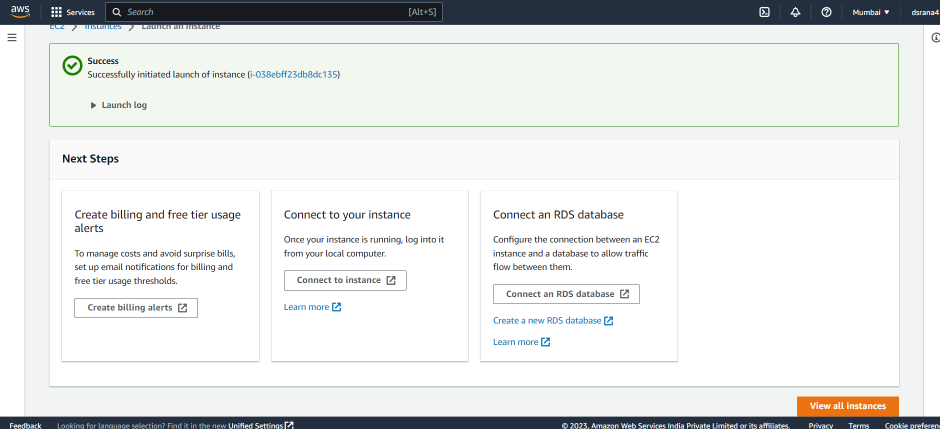
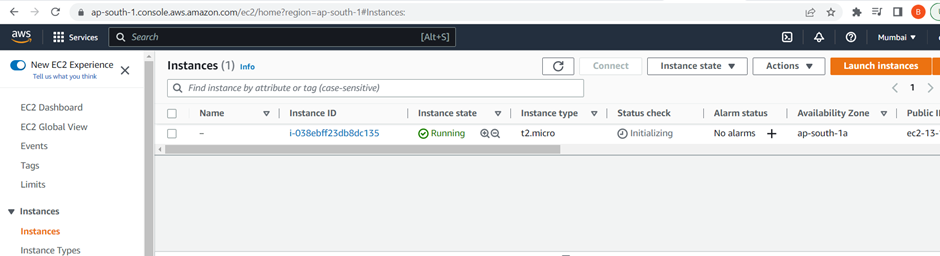
Now instance have created successfully, for view instance click on View all instances button.
![](https://blogshub.co.in/wp-content/uploads/2023/01/image-152.png)
![](https://blogshub.co.in/wp-content/uploads/2023/01/image-153.png)
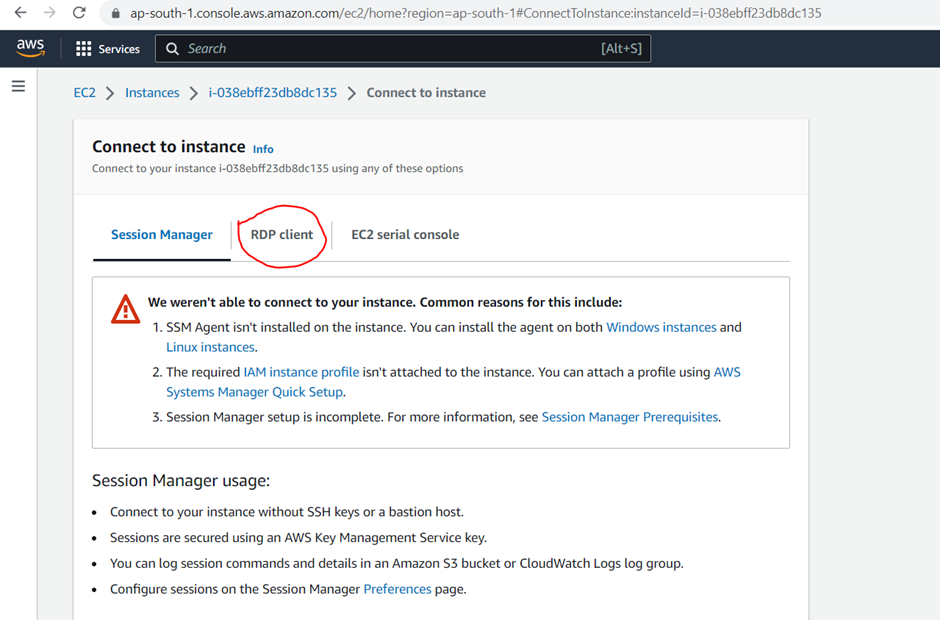
Now select the instance and click on connect
![](https://blogshub.co.in/wp-content/uploads/2023/01/image-154.png)
Now click on RDP Client
![](https://blogshub.co.in/wp-content/uploads/2023/01/image-155.png)
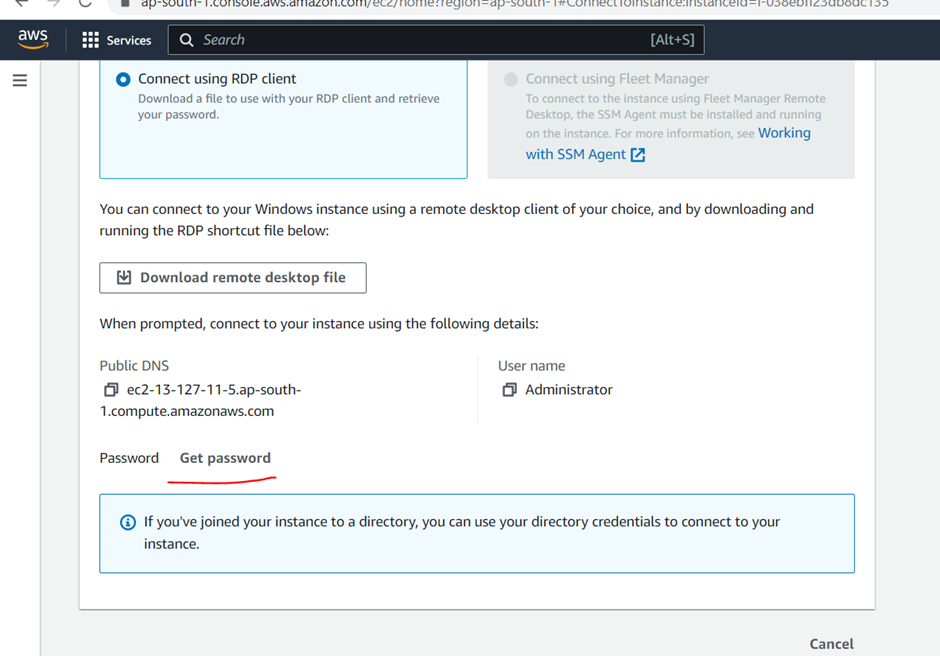
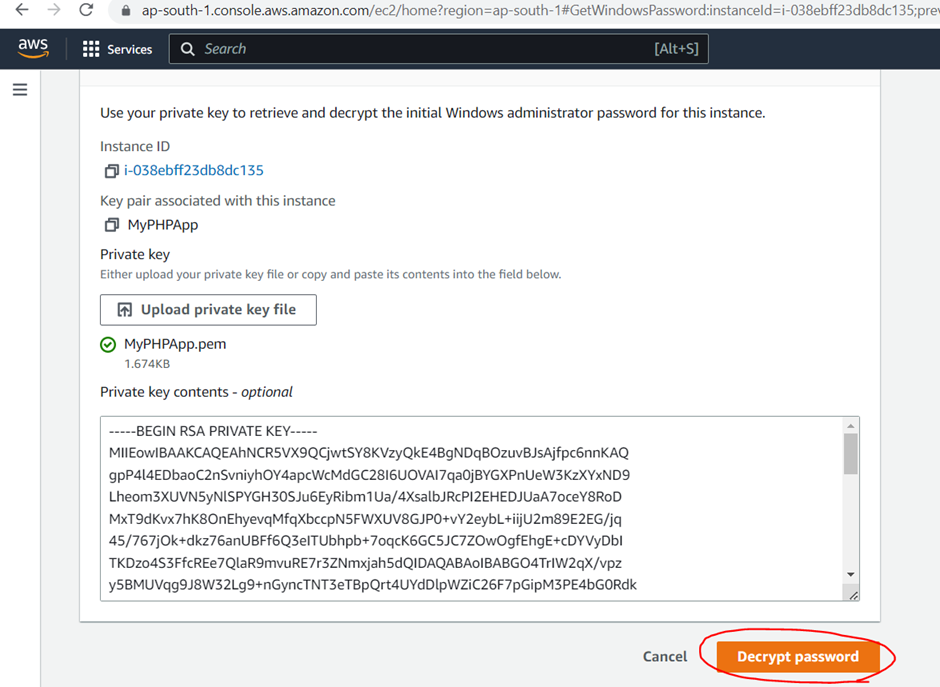
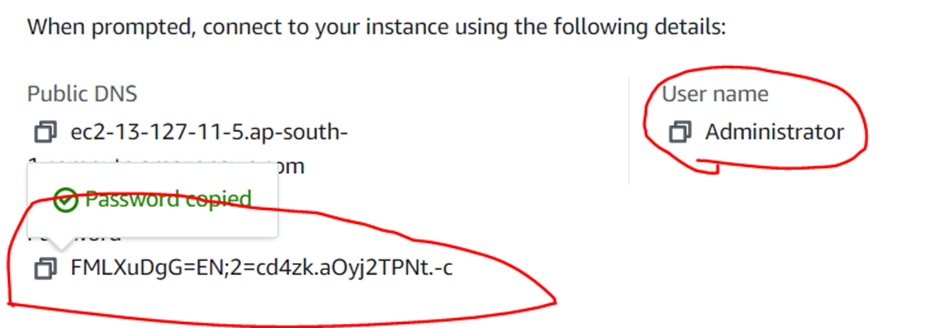
Then click on Get Password and browse your keypair which you have already downloaded
![](https://blogshub.co.in/wp-content/uploads/2023/01/image-156.png)
After browse the file click on Decrypt password button.
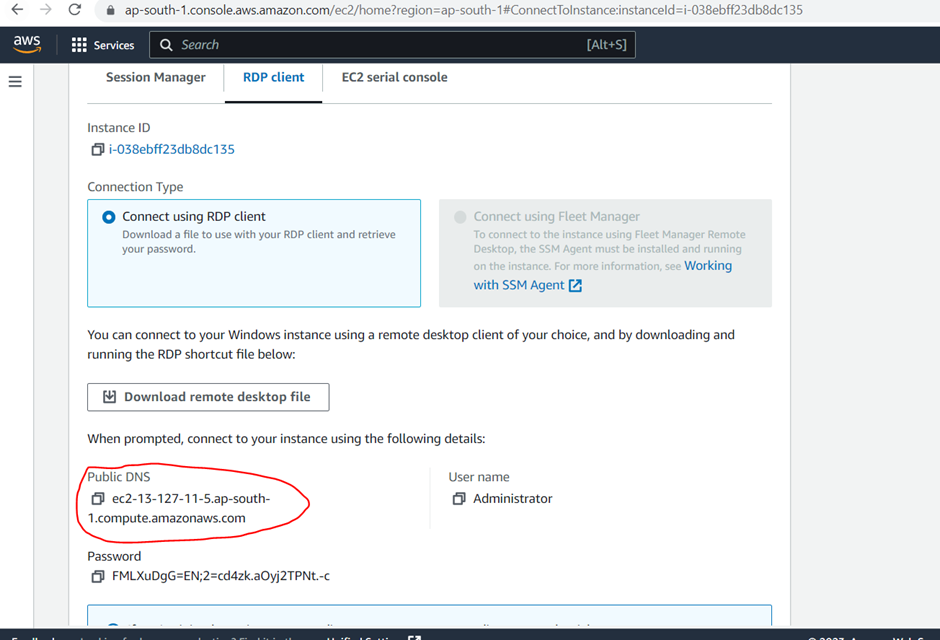
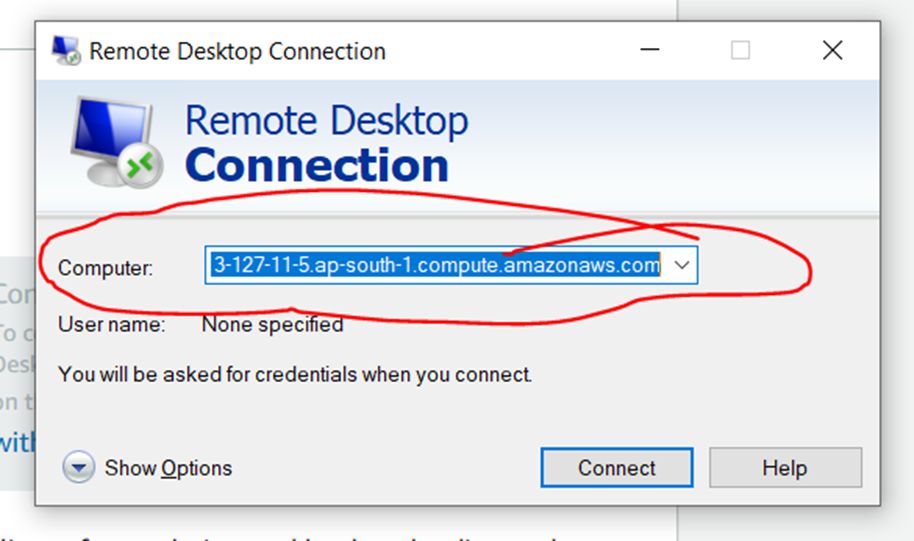
![](https://blogshub.co.in/wp-content/uploads/2023/01/image-157.png)
Copy the public DNS
![](https://blogshub.co.in/wp-content/uploads/2023/01/image-158.png)
Open the “Remote Desktop”
![](https://blogshub.co.in/wp-content/uploads/2023/01/image-159.png)
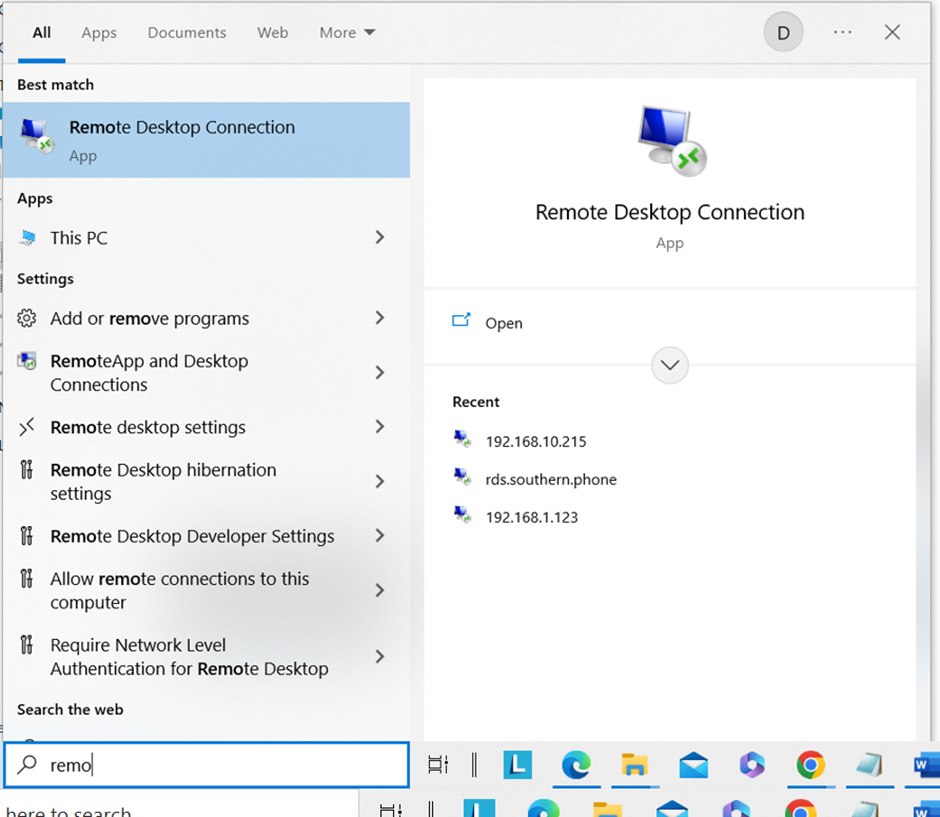
Enter your DNS and click on “Connect”
![](https://blogshub.co.in/wp-content/uploads/2023/01/image-160.png)
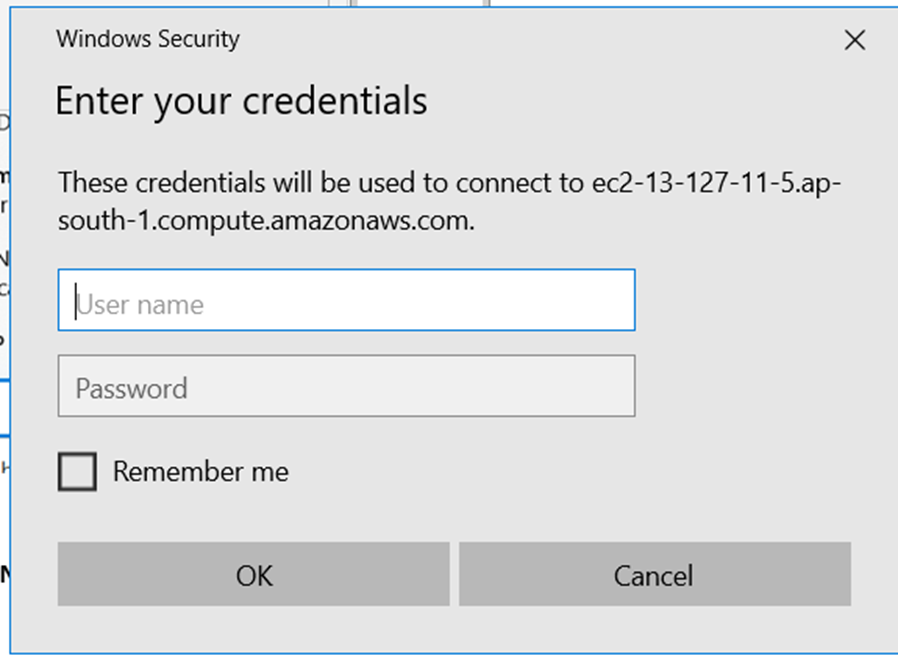
Enter your credentials
![](https://blogshub.co.in/wp-content/uploads/2023/01/image-161.png)
![](https://blogshub.co.in/wp-content/uploads/2023/01/image-162.png)
Now you can see your AWS machine and you can install your other applications as per requirement.
Happy Learning 🙂