Social Login using angular
In this topic you will learn how to login with Facebook and Google in the angular app using the angularx-social-login npm package. It is easy and fastest way to login in application using social network platform .
1 Install Angular
install it with the below command:
npm install -g @angular/cli2. Create new project
ng new projectname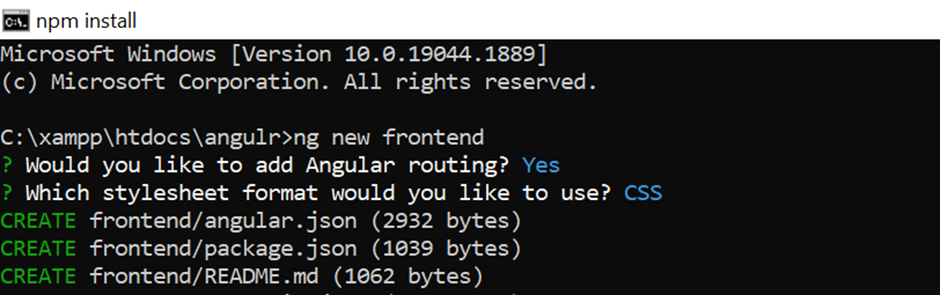
3. Now Install the angular social login plugin using cmd
npm install angularx-social-login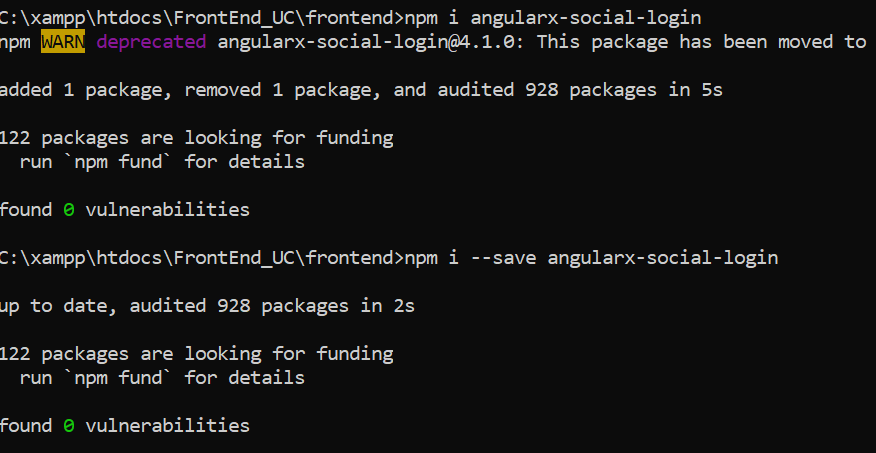
4. Import social library in the app.module.ts file and add code in provider array
import { SocialLoginModule, SocialAuthServiceConfig } from 'angularx-social-login';
import {
  GoogleLoginProvider,
  FacebookLoginProvider
} from 'angularx-social-login';

 imports: [
    BrowserModule,
    AppRoutingModule,
    NgbModule,
    FormsModule,
    HttpClientModule,
    SocialLoginModule
  ],

providers: [
    {
      provide: 'SocialAuthServiceConfig',
      useValue: {
        autoLogin: true,
        providers: [
          {
            id: GoogleLoginProvider.PROVIDER_ID,

            provider: new GoogleLoginProvider('654230831370-a114u4r22ehgpfrods4irbj91eoerq9a.apps.googleusercontent.com',
            {
             // scopes : environment.auth.scopes,
              prompt : 'none'   // '' | 'none' | 'consent' |  'select_account'
            }),

          },
          {
            id: FacebookLoginProvider.PROVIDER_ID,
            provider: new FacebookLoginProvider('1442566939524545')
          }
        ],
        onError: (err) => {
          console.error(err);
        }
      } as SocialAuthServiceConfig,
    }
  ],
5 Create social login function in login.component.ts
import { FacebookLoginProvider,GoogleLoginProvider, SocialAuthService, SocialUser } from 'angularx-social-login';
user:SocialUser | undefined;
loggedIn: boolean | undefined;
isLoggedin?: boolean = undefined;
constructor(private backend: BackendService, private token: TokenService, private router: Router, private Auth: AuthService, private ssoauthService:SocialAuthService) {
}
ngOnInit(): void {
this.ssoauthService.authState.subscribe((user)=>{
this.user = user;
this.loggedIn = (user != null);
this.isLoggedin = user != null;
console.log("Login User = " + this.user.name + this.user.email);
});
}
signInWithFB(): void { //Facebook Login
this.ssoauthService.signIn(FacebookLoginProvider.PROVIDER_ID);
}
signWithGoogle():void{console.log("googlesignin"); //for google sign in
this.ssoauthService.signIn(GoogleLoginProvider.PROVIDER_ID);
console.log("googlesignin1");
}
signOut():any{ //for google out
this.ssoauthService.signOut();
}
refreshToken(): void {
this.ssoauthService.refreshAuthToken(FacebookLoginProvider.PROVIDER_ID);
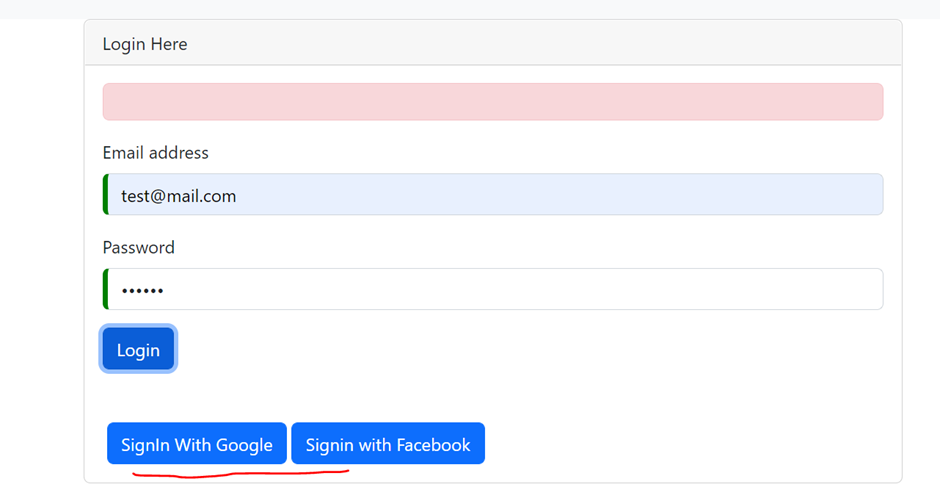
}6) Create Login button in login.component.html
<button class="btn btn-primary btn-social-icon btn-google mx-1" (click)="signWithGoogle()">
                <span class="fab fa-google">SignIn With Google</span>
              </button>

              <button type="button" (click)="signInWithFB()" class="btn btn-primary btn-block">Signin with Facebook</button>

 <div *ngIf="isLoggedin === true">

          <button type="button" (click)="signOut()" class="btn btn-primary">Sign Out</button>
        </div>
Create Facebook App ID
Follow the below recommended steps for creating Facebook App Id -:
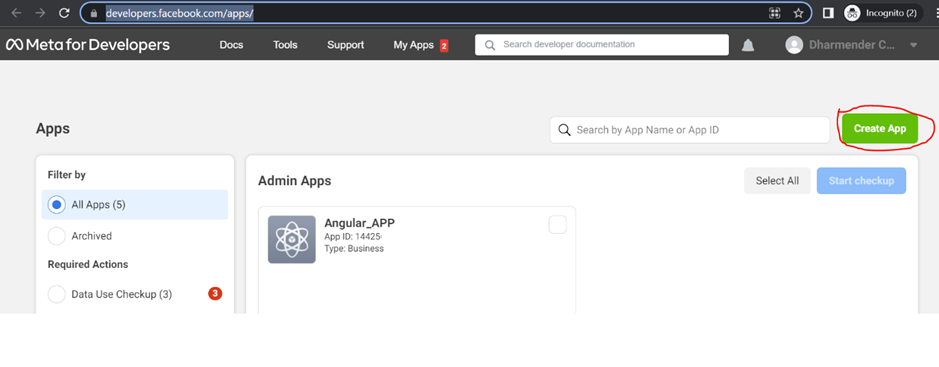
A. Visit on https://developers.facebook.com/apps/
B. Click on “Create App” button
C. Select an app type and click on next
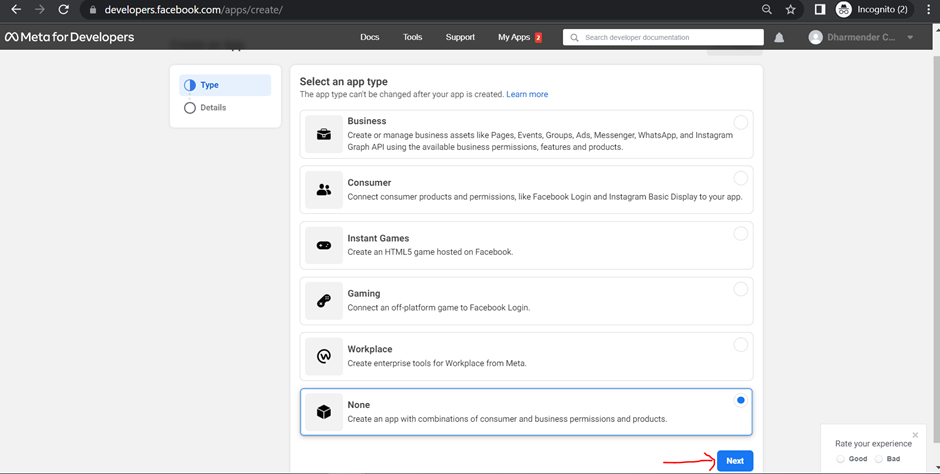
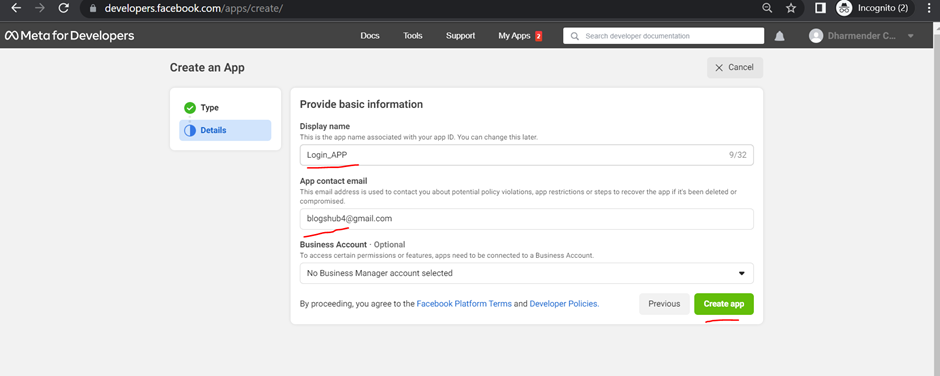
D. Add the Display name and app contact email then click on the “Create App” button.
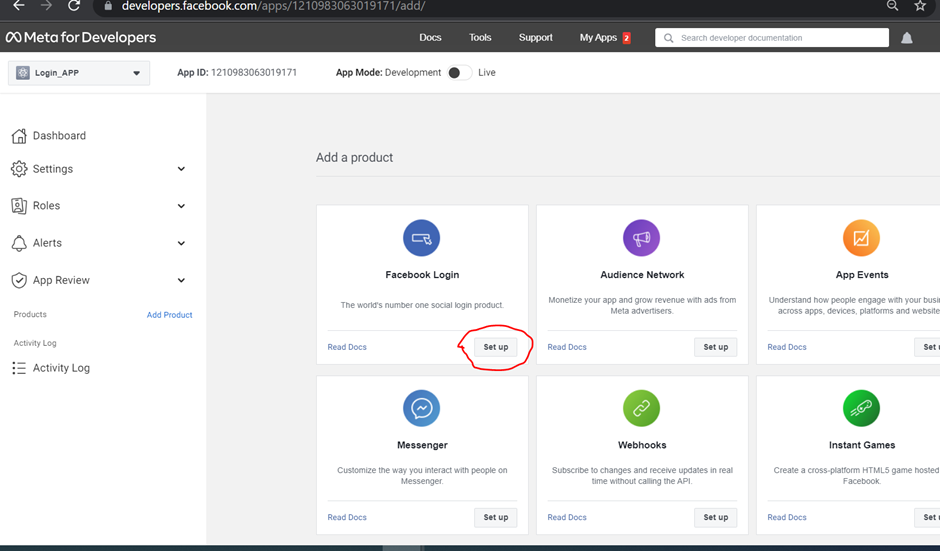
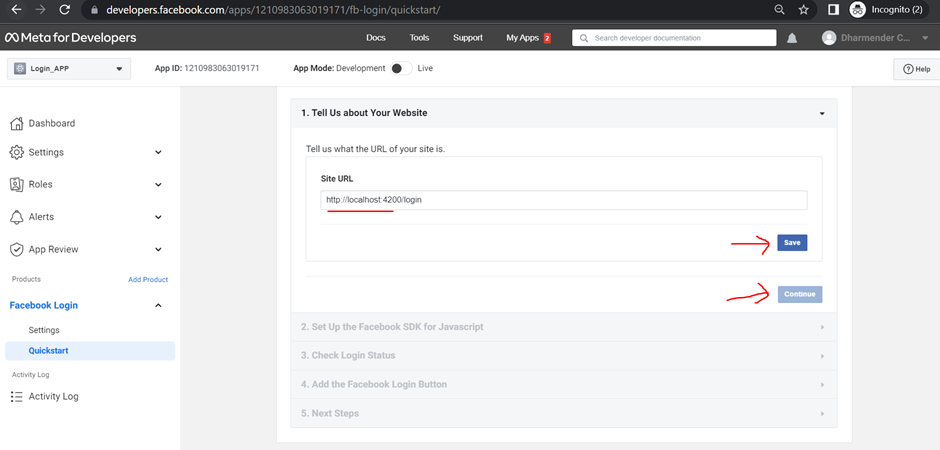
E. Click on “set up” button in Facebook Login card.
F. Click on “WWW Web” icon
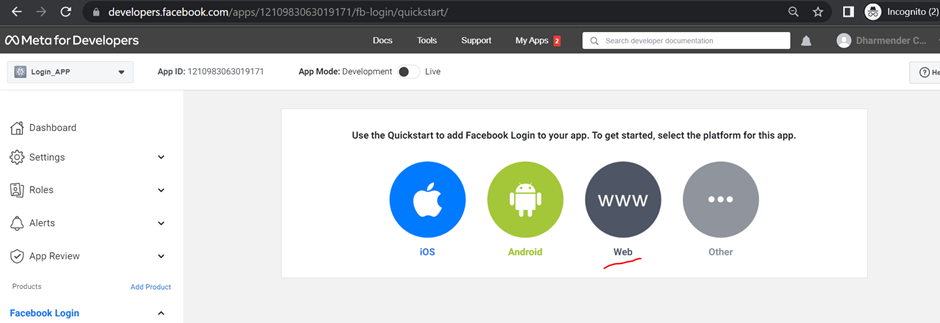
G. Enter “Site URL” and click on “Save” then “Continue” button
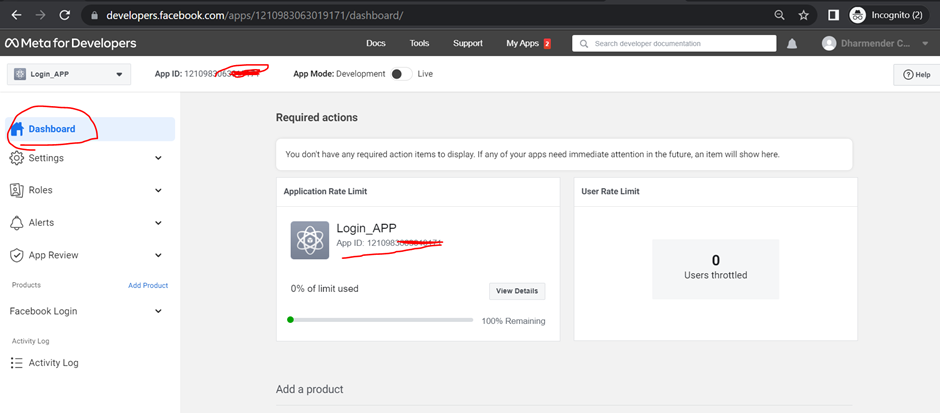
H. Click on “Dashboard” in left side and can copy your App Id
Create a Google Client ID
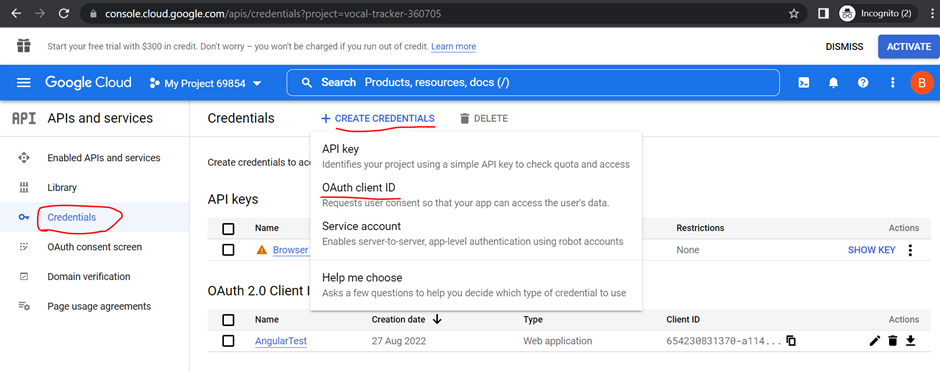
- Go to : https://console.cloud.google.com/apis/credentials
- Click Credentials on left side then click on “CREATE CREDENTIALS” on top and select “OAuth client ID”
3. Select “Web Application” inside Application Type
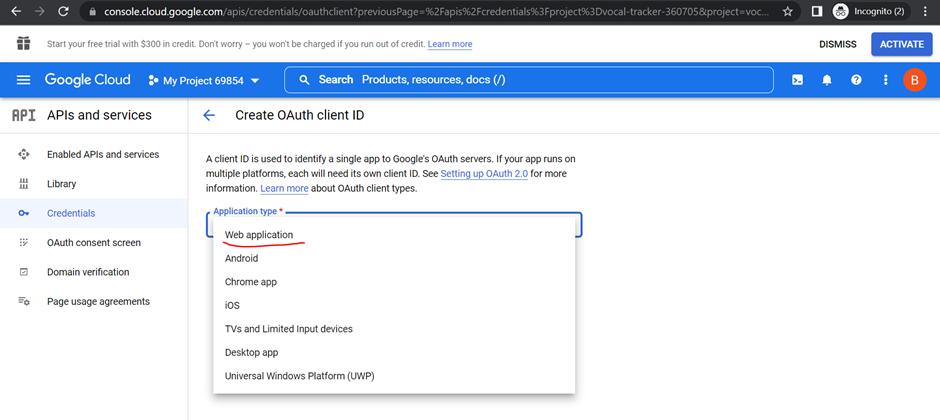
4. Enter app Name and enter URL’s then Click on “CREATE” button
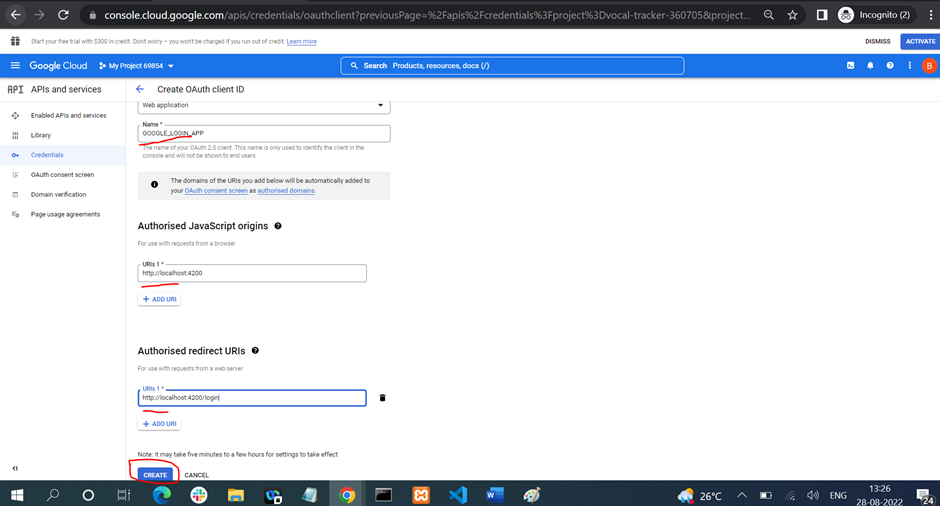
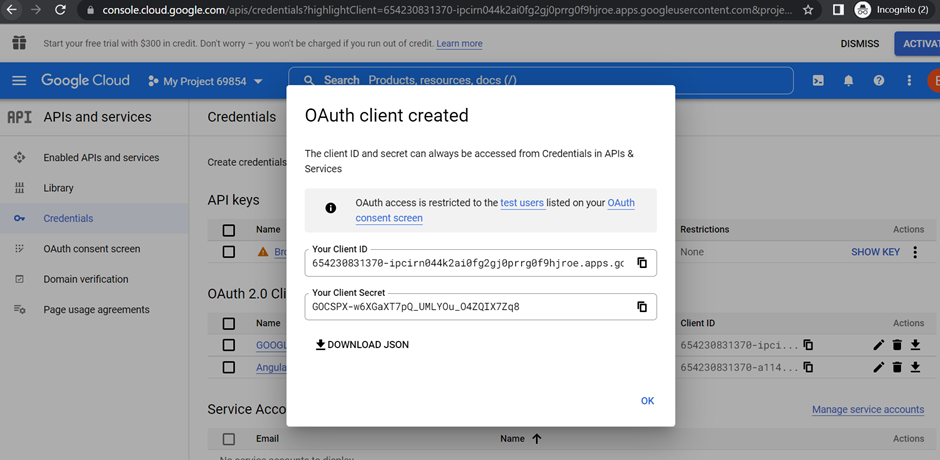
5. Copy Your Client ID.
Complete Code for Social Login